Rose Bouquet Sponge Cake
Overview
Roses symbolize love, whether they are yellow roses, pink roses, red roses, or roses of other colors. It is said that different colors represent different stages and meanings of love. Today I specially made a rose bouquet cake, not only because I like roses, but also mainly because I saw gourmet celebrity Wen Sunny at Meitian's annual food competition. This cake was so amazing that I really kept thinking about it. So take some time to learn how to do it. If you can read this article, then I also wish that you, who are single, can find your significant other as soon as possible and have a sweet love. I also wish that you, who are married, can be sweet and write a chapter of love together with your lover. This cake is divided into three parts: A. Making the sponge cake body, B. Making butter roses, and C. Filling, frosting and decoration.
Tags
Ingredients
Steps
-
Cake ingredients are ready

-
Put 6 eggs into a basin without oil and water, and put 120 grams of sugar together

-
Use an electric egg beater to beat the eggs at low speed and then medium speed. The eggs will expand in size and turn white in color. The egg liquid will become viscous. Lift the egg beater and make 8 figures. The egg liquid will not disappear easily

-
Put the butter and milk liquid into a basin in advance, melt it over water, and let it dry until it is warm to your hands

-
Sift in the cake flour twice, mix the first part of flour and egg batter evenly, then sift in the second part of flour

-
The flour is all mixed with the egg batter

-
Use a spatula to take three shovels of batter into the butter and milk mixture, and mix evenly

-
Pour the mixed batter back into the large bowl of batter

-
Fold into a shiny and delicate cake batter. Be careful to use light and fast techniques and do not mix in random circles

-
Pour the cake batter into two 6-inch removable bottom cake molds and shake them lightly a few times to release any excess air bubbles

-
Put it into the middle rack of the preheated oven at 150 degrees for about 50 minutes. If the surface is too stained, add a layer of tin foil

-
After taking it out of the oven, shake it a few times to knock out the excess heat from the cake, then turn it upside down on a rack to let it cool naturally before demoulding

-
Buttercream flower materials are ready

-
Add butter to powdered sugar and beat with an electric mixer until evenly mixed. Add whipped cream in three batches

-
The cream is enlarged in volume, slightly lighter in color, and has a fine texture

-
Take an appropriate amount of buttercream and put it into a piping bag with a straight-line nozzle to make a rose shape (I won’t give detailed instructions here, you can refer to my previous articles or find videos to learn)

-
Add appropriate amount of red coloring to the remaining buttercream to make it pink

-
Make roses of different colors from the cream frosting, place them on a baking sheet, cover with plastic wrap, refrigerate and harden before use

-
Unmould two 6-inch sponge cakes

-
Cut each one crosswise into two equal parts. In fact, I only used 3 slices, which is the amount of one and a half cakes. The cake made in this way has a certain height and is more beautiful

-
Pour the whipping cream that has been refrigerated for more than 10 hours into a basin and add sugar

-
Use an electric mixer to beat at low speed until obvious lines appear and the state is not very fluid

-
First take one side of the cake and place it on the plate

-
Complete the three-layer cake in the order of one layer of cream and one layer of cake

-
Spread butter evenly on the outermost and top layer

-
Add a few drops of green coloring to the remaining whipped cream and beat evenly

-
Put a round piping nozzle into a piping bag, put an appropriate amount of green butter into the bag, and draw lines from bottom to top around the cake, like the stem of a rose

-
Apply another layer of green cream on top, and place the refrigerated and hardened roses randomly on the top

-
Take a floral and leaf piping tip and put it into a piping bag, put the green butter into the bag, and squeeze out the floral leaves into the gaps and edges of the flower

-
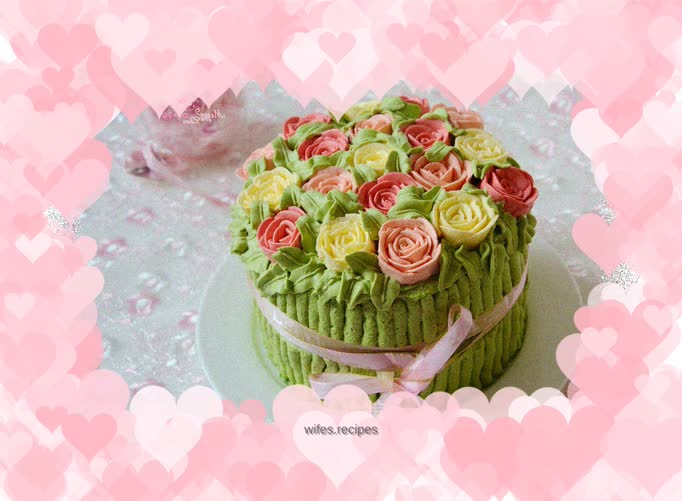
Add a ribbon for binding and decoration, and it will look more like a big bouquet of roses

-
I really like it
