Pure mung bean cake--plus tips for faster peeling of mung beans
Overview
Haha, today I present to you a late Dragon Boat Festival snack - mung bean cake. Speaking of which, I have searched for many recipes for this mung bean cake since I wanted to make it. It can be roughly divided into two types: one is made with mung bean powder steamed, which I have tried, and it is more convenient, but the taste is rough; the other is made with soaked mung beans peeled and steamed. Anyone who has done it first praises its delicate and pure taste, and second, unanimously says that peeling is the most tiring process. With the awareness that I would never be tired, I finally started making the mung bean soaked hair version. After soaking the mung beans, I first peeled them one by one like everyone else. After a while, my fingers felt like they were tingling. Suddenly, an idea flashed through my mind, and I remembered the scene when my parents put fresh potatoes in a stone mortar and peeled them with thick wooden sticks. At that time, I was curious as to why the potatoes were not smashed by the thick wooden sticks, but took off most of the skin. Doesn't this principle apply to my current peeling of mung beans? I immediately found a garlic pounder and tried it by grabbing a handful of mung beans. The effect was indeed very good. After pounding it for a few times, a lot of the mung bean skins had come out. I rinsed it with water and most of it was removed. Of course, the remaining ones can only be removed one by one by hand, but it saves a lot of labor compared to peeling them all one by one. I am very happy to have discovered this trick. I recommend it to everyone. I can use it in the future when I want to make pure mung bean cake but I am afraid of the trouble of peeling it. Another point is that the oil in the original recipe is all sesame oil. I thought it was too fragrant and I couldn’t stand it, so I replaced half of it with salad oil. Later, I used butter again. Personally, I think butter has a milky aroma and is more delicious. I decided to use butter in the future.
Tags
Ingredients
Steps
-
Soak the mung beans overnight or longer until you can peel them with your hands.

-
Okay, pay attention, here is the trick to peeling mung beans. Just take a garlic pounder, put a handful of mung beans into it, pound it in circles, rinse with water to remove the mung bean skins floating on top, continue pounding a few more times, rinse again, repeat two or three times, and finally, remove the remaining mung bean skins one by one with your hands, and that's it.

-
All mung beans with the skin removed. (It’s not easy, haha)

-
Steam the peeled mung beans and crush them as much as possible with a spoon.

-
Put an appropriate amount of butter into the pot (the amount of butter is about 1/10 of the mung bean paste. The butter can also be replaced by half and half of salad oil and sesame oil, but I think butter tastes better). After the oil is hot, lower the heat and pour in the mung bean paste and stir-fry for a few times.

-
Pour in an appropriate amount of sugar (or honey) and slowly stir-fry until the sugar dissolves and the mung bean paste forms into a ball.

-
Wear disposable gloves, take a small piece of mung bean paste and roll it into a ball.

-
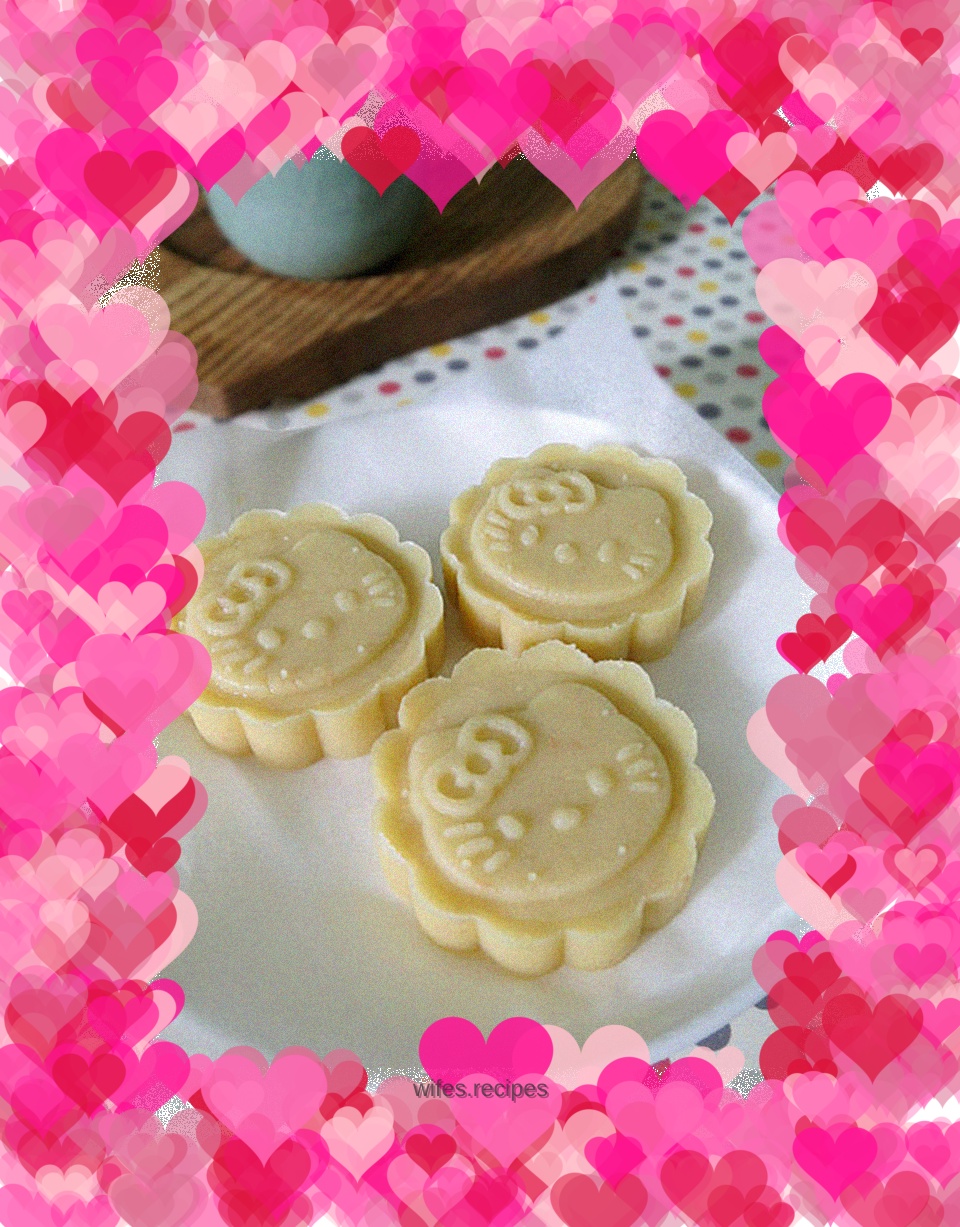
Place into mold.

-
Press down with your mouth, lift and push, and the pure-tasting mung bean cake is ready. It tastes better when refrigerated.
