Pineapple Decorated Cake
Overview
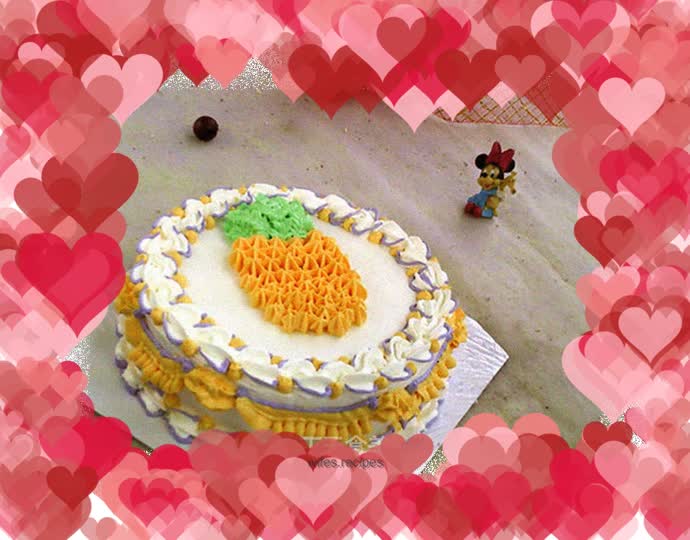
The unexpectedly delayed pineapple. Imagine it is completed with a star-toothed flower mouth, with small golden stars squeezed together to form the unique eyes of a pineapple, with long green leaves on the top of the head...Imagination is always more perfect than execution. Ever since the rose collapsed, how to keep the cream strong and always smooth and delicate has become a lingering question in my mind. Thinking about the previous cakes, you can always see the cream starting to foam and thicken the next day. What has remained in good condition from beginning to end should be the happy birthday cake. Because it was killed that night, and the time from birth to death only lasted three to five hours. Time, the pig-killing knife, has not had time to display its power. . . Whip the cream in ice water and it starts to feel better and better. However, the toned cream is still annoying. Because the amount of it is very small, I only pick out a small amount of white cream for coloring every time. When I hold it in my hand, it will quickly become thin and soft. If you mix more, there will be leftover, and you may not be able to use it up next time.
Tags
Ingredients
Steps
-
Materials

-
Smooth the top of the cake and set aside

-
Whip cream and sugar into peaks

-
Use a spatula to pick out an appropriate amount of butter and spread it on the surface

-
Smooth the top and sides

-
Use a star tooth nozzle to extrude the shell pattern on the bottom edge

-
Continue to extrude the heart shape on the top edge

-
Crowded in a circle

-
Mix yellow cream and squeeze out a pineapple shape in the center

-
Extrude spiral patterns with equal spacing on the top edge of the side

-
Change the leaf-shaped flower nozzle and extrude arcs between the spiral patterns on the side

-
Change to a thin piping bag and put golden balls on the junction of the inner and outer edges of the top heart shape

-
Also dot the junction of the bottom shells

-
Mix green cream, change the leaf-shaped nozzle, and squeeze out long leaves on the top of the pineapple

-
Mix purple cream and use a fine piping bag to outline both sides of the heart shape

-
Use purple dots to make small dots at both ends of the middle arc, and then extrude thin purple arcs along the arc to connect the two small dots

-
The shell pattern on the bottom is also decorated with purple edges on both sides

-
Complete
