Printed cookies
Overview
In the past few days, the temperature has suddenly risen to more than 30 degrees, which is rare in May. In the afternoon, the sun is blazing, and a wisp of cool breeze blows through the gauze curtains, blowing around me, carefully making pieces of snowflakes, and meticulously depicting each little person. Even if I don’t have time for a lunch break, even if it takes a day and a half to do this, I am the happiest and enjoy the most at this time! Because this is my happiest moment - doing what I love to do. There will be a party in a few days, and I thought of making such a cute cookie for the children, and sending some snowflakes to everyone to bring a bit of coolness.
Tags
Ingredients
Steps
-
Material preparation.

-
Cut butter into small pieces and soften at room temperature.

-
Add powdered sugar and beat until smooth.

-
Add condensed milk and mix well.

-
Add egg yolks in portions and mix evenly.

-
Sift in the flour and mix well with a spatula.

-
Chill the dough in the refrigerator for an hour and then take it out.

-
Place the dough between two layers of plastic wrap and use a rolling pin to roll it into a thin sheet.

-
Cut out cookie shapes using round cutters.

-
Take the stamped mold and place it on the cookie dough.

-
Dip an oil paintbrush into cocoa powder, matcha powder, edible color powder or red yeast rice powder (dry powder, without adding water or anything else). According to the color of the printing mold, gently brush it into the gaps of the printing mold. Don't get too much powder.

-
Take out the printing mold.

-
Place the prepared cookie dough into the preheated oven.

-
degrees, 12-15 minutes. (Adjust the temperature and time according to your own oven, do not color too darkly)

-
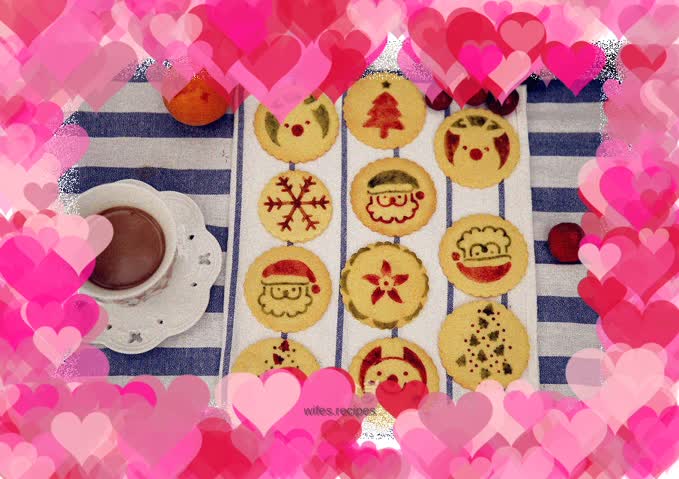
Appreciate the finished product.

-
Appreciate the finished product.

-
Appreciate the finished product.

-
Appreciate the finished product.

-
Appreciate the finished product.

-
Appreciate the finished product.

-
Appreciate the finished product.
