Mung bean paste mooncake
Overview
How to cook Mung bean paste mooncake at home
Tags
Ingredients
Steps
-
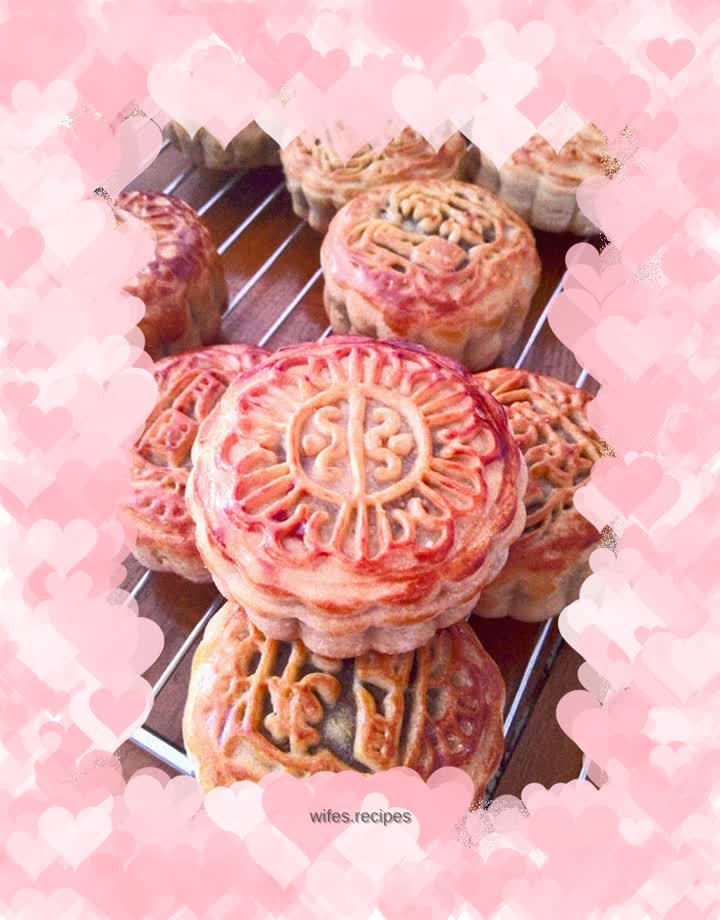
These were freshly baked mooncakes, still steaming. The room was filled with the unique fragrance of mooncakes. Looking at the delicious mooncakes, I felt the urge to take a bite. I couldn’t resist the temptation and ate one right after it was baked. The taste: I made it myself, so of course it tastes the best! I don’t like it to be too sweet or greasy, so when making mung bean paste filling. The amount of sugar and oil has been reduced, so the taste is lighter, which I personally think is more delicious. The advantage of making it yourself is that you can make healthy mooncakes that suit your own taste.

-
The syrup I made myself is a darker golden color. It was made in advance and has been stored for more than ten days.

-
Put the syrup, syrup, and peanut oil together and mix them thoroughly. I don't have a whisk, so I mixed them by hand, and the mixture was not very complete.

-
After the sugar and oil are mixed, add the flour. When adding the flour, add more than half at the first time. Stir evenly and then add in small amounts several times until the dough can be formed.

-
The prepared dough is very soft. Wrap it in plastic wrap and let it rest for more than two hours. I made it the night before and planned to use it the next day, so I let it rest in the refrigerator.

-
Take the relaxed dough out of the refrigerator and divide it into the required size (my mold is 100g, I did not weigh it, I divided it based on feeling), and measure the mung bean paste and form it into a ball.

-
Take a piece of dough and a bean paste ball, press the dough down slightly, and then slowly push it up.

-
Push slowly so that the dough evenly covers the filling.

-
This is wrapped.

-
Roll the wrapped biscuits in dry flour, then tap off the excess flour with your hands.

-
Put a little dry flour into the mold, turn it with your hands, and then pour out the excess flour.

-
Put the cake into the mold and press it firmly with your hands, but don't use too much hands.

-
Gently roll out the mooncakes and place them on a baking sheet lined with tin foil.

-
My baking pan is not big and I can only fit 9 on one plate. Preheat the oven at 200 degrees for 5 minutes. Before putting the mooncakes into the oven, brush a layer of water with a brush (I originally sprayed them with a kettle, but I couldn't find the small watering can, so I had to use a brush).

-
After brushing with water, put it in the oven and bake it at 200 degrees for 10 minutes. Take out the baking pan, wait for a while, and brush it with egg wash (mixed with one egg yolk and one spoon of water). Be gentle when brushing the egg, don't brush too much, otherwise the pattern will be gone when baked. After brushing it with egg wash, quickly put it in the oven, bake it at 180 degrees for 5 minutes, take it out again, and brush it twice with egg wash.

-
After brushing with egg wash, bake in the oven at 180 degrees for 10 minutes, until the mooncakes are golden brown or darker. I personally prefer a darker color. Take out the baking sheet, put the mooncakes on the baking grid to cool naturally, then put them in a fresh-keeping bag for a day and the oil will return. I saw some netizens saying that after taking out the mooncakes, brush a layer of cooking oil to make the oil return faster. I will try it next time. However, this method of mine also made the oil return very fast, and it was shiny the next day, very beautiful).
