hellokitty cookies
Overview
Hellokitty has always been a popular trend, because the cute image of Kitty Cat has always been deeply rooted in the hearts of the people. I think every girl will like it. Make a Kitty Cat by yourself and give it to the children who like Kitty Cat!
Tags
Ingredients
Steps
-
Prepare the required ingredients.

-
Soften the butter, add powdered sugar, and use an electric mixer to beat the butter and powdered sugar until combined.

-
Add the egg liquid in three batches and beat until evenly mixed each time before adding the next amount.

-
Beat the egg mixture and butter-sugar mixture until fluffy.

-
Sift in the low-gluten flour and mix with a spatula.

-
Use a spatula to stir into a dough, or you can knead it directly with your hands.

-
Wrap in plastic wrap and refrigerate for 30 minutes to 1 hour.

-
Take out the dough from the refrigerator, cover it with a layer of plastic wrap, take a little dough and roll it into a thin sheet of about 5 mm.

-
Use helloKitty cookie cutters to cut out shapes.

-
Use a spatula to transfer cookie sheets to a parchment-lined baking sheet.

-
Arrange them one by one on the baking sheet, remember to line with parchment paper.

-
Place in the middle rack of the preheated oven, heat up and down, 160 degrees, for 15 minutes; take out and cool after baking.

-
Take a small piece of dark chocolate and put it in a bowl and heat it in the microwave until it melts. You can also heat it in warm water until it melts.

-
Use a paintbrush dipped in dark chocolate to draw eyes on Kitty biscuits.

-
Continue to use red and yellow chocolate to draw the outline of the bow and mouth of hellokitty.

-
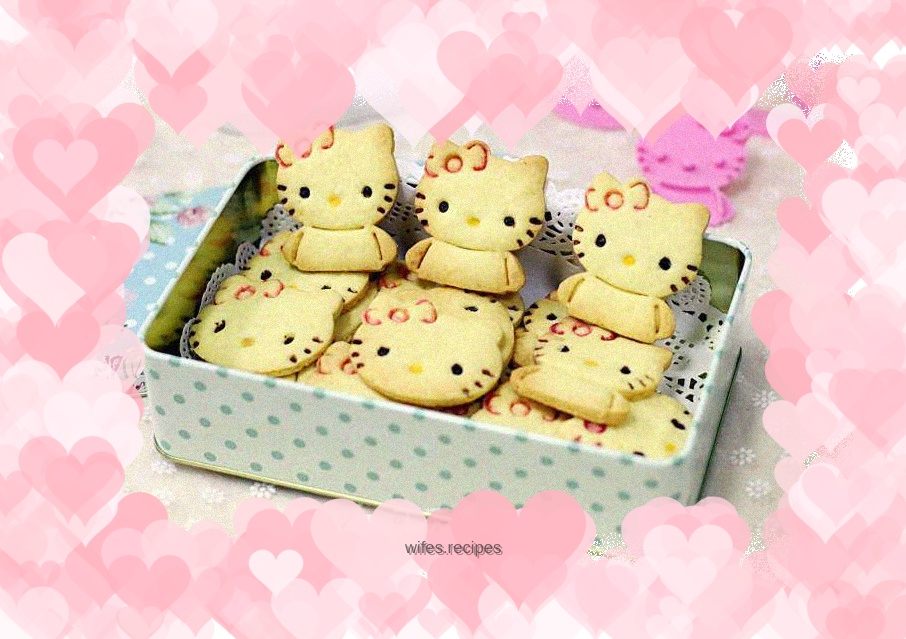
Isn’t this cookie cute? !

-
If you can't finish it, keep it sealed to prevent it from getting damp.

-
Try it with your kids!
