Snow doll fondant cake
Overview
Fondant cake, an art cake originated from the United Kingdom, is a very popular decoration technique at present. Fondant is extremely malleable and can be shaped into a variety of shapes, which can also be completed with the help of molds. Fondant cakes last longer than cakes decorated with fresh cream and have a three-dimensional shape. In order to be more detailed, there are more steps to take pictures of this snow doll, so the cake base is omitted because the fondant will have a certain weight. Just be careful to choose a cake base with strong endurance such as sponge cake.
Tags
Ingredients
Steps
-
Use the selected pigments to dye the fondant paste into the desired color

-
Sprinkle some powdered sugar on the chopping board, apply white oil on your hands, measure the size of the cake, roll out the main color fondant paste into a sheet, be careful not to make it too thin

-
Gently cover the fondant paste on the cake base that has been spread with butter

-
Use a roller cutter to cut off the excess part around

-
Use a pressing plate to flatten the surface of the cake

-
Take the original color fondant paste and shape it into an oval

-
Then pinch out a smaller piece, as shown in the picture

-
Use a round tool to press it

-
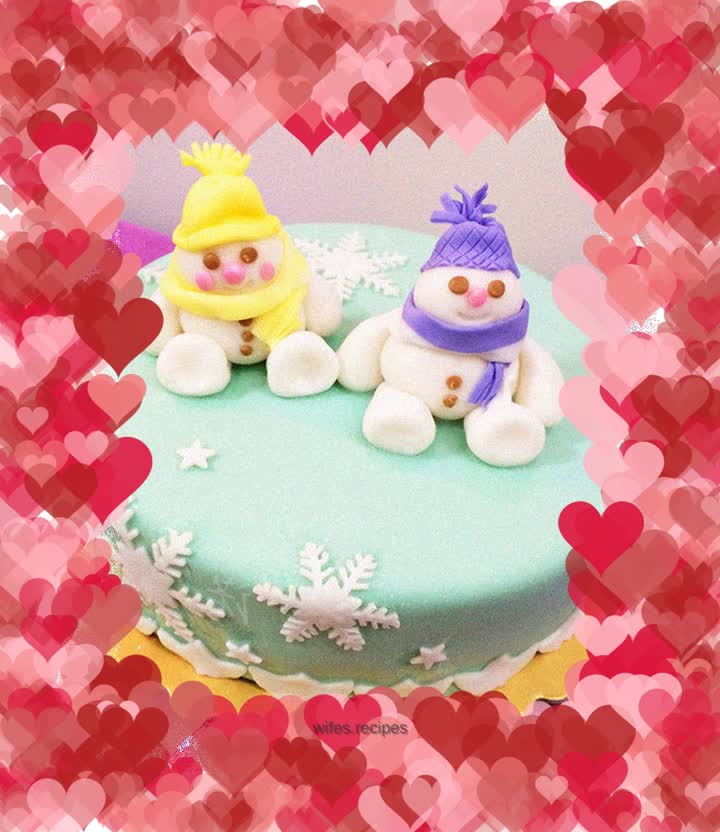
The body, limbs and head of the kneaded snow doll

-
Put it together and glue the joints with honey

-
Then take the colored ones and pinch out the eyes and nose

-
Glue the eyes and nose on the snow doll

-
Take a piece of purple fondant paste and roll it flat

-
Cut out a small piece and press out patterns at will, as shown in the picture

-
Connect them and put them on the snow doll’s head

-
It doesn’t look perfect, so I made another tassel

-
After gluing it on, it looks much better

-
Use tools to make a smiling mouth for the snow doll

-
Roll out the purple and white fondant paste into two round strips

-
Place them side by side and roll them into long strips

-
Cut out tassels at both ends

-
Wrapping it around Snow Doll’s neck, doesn’t it look very warm?

-
Use the same method to make him a girlfriend, add a red face and she will be a female doll

-
Use a mold to carve snowflakes

-
Stick to the appropriate position on the cake body

-
Finally, decorate around the cake and it’s done
