Mochi Red Bean Paste Mooncake
Overview
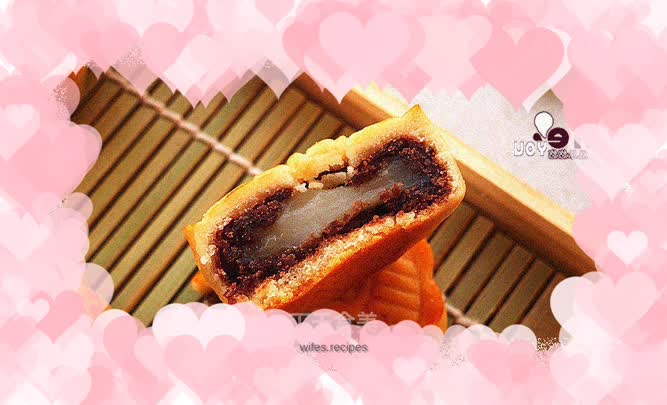
This is the first time I have made Cantonese-style mooncakes. I actually don’t like eating mooncakes because they taste very sweet and greasy. But after making them yesterday, I couldn’t wait to eat one, and I realized that the mooncakes I made are completely different from those outside. When I took the first bite, I wanted to take a second bite. I didn’t want to stop and eat one moon cake and wanted to have a second moon cake. The red bean filling is wrapped with [mochi]. The improved filling is very special. In the past, when I ate mochi, it was delicious when wrapped in crushed peanuts. So I thought of incorporating mochi into Cantonese-style mooncakes. The improved bean paste filling tastes very good and has a chewy texture. When I was making it, I wondered if the mochi would be hard when I ate it the next day, but I ate one immediately after the oil returned. . . The texture is as chewy and tender as freshly made mochi. . When you break the mooncake apart with your hands, the mochi looks like "drawn" mozzarella cheese. The first mooncake I made was a success. I thought it would be difficult to make when I first made it, but it is actually very simple to make. .
Tags
Ingredients
Steps
-
Weigh the invert syrup and set aside.

-
Add Lianshui.

-
Use a whisk to stir the syrup into a milky consistency. The color of the syrup after adding the water will gradually lighten and become thinner after stirring.

-
Add cooking oil and continue to stir evenly.

-
The stirred syrup and water drip down slowly.

-
Sift in all-purpose flour.

-
Use a spatula to stir evenly and then knead with your hands a few times.

-
Place in plastic wrap and refrigerate for 2 hours.

-
At this time, start making mochi. Weigh the glutinous rice flour and corn starch and mix them evenly.

-
Add the milk and mix well with a spoon.

-
Place in a hot pot and steam over medium heat for 15 minutes.

-
Take out the steamed mochi.

-
While hot, use chopsticks or a spoon to stir the mochi until soft.

-
When the mochi is still slightly warm, use cooking oil on your hands or put on disposable gloves to separate the mochi into 5-gram mochi balls.

-
Roll the red bean paste into balls, 20g each.

-
Then take a piece of kneaded red bean paste and put it in the palm of your hand, and press a hole with your thumb.

-
Place a mochi ball in the middle of the red bean paste.

-
Wrap the mochi ball and use the palms of your hands to press the red bean paste into a round shape.

-
After 2 hours, take out the mooncake skin, divide each mooncake skin into 20 grams and roll it into balls.

-
Take a mooncake crust and flatten it slightly with the palm of your hand.

-
Place the mooncake skin in the palm of your hand.

-
Place the wrapped mochi and red bean paste filling into the middle of the mooncake skin.

-
according to your personal taste Use the tiger's mouth to slowly wrap the mooncake skin with the mochi and bean paste filling, slowly close the mouth and roll it into a round shape.

-
Put a little dry powder into the mooncake mold and shake it around so that the dry powder is all around the mold; pour the excess back into the bowl.

-
Also sprinkle a little dry powder on the mooncakes, just a little bit is enough, but not too much, otherwise it will affect the appearance after baking. Then put it into the mold and press the mooncakes in the mold slightly with your hands.

-
Put the mold down and press it down slowly.

-
In this way, you will get a nice-looking mooncake. You have to press slowly when pressing, and the shape of the mooncake will be irregular if you press it too fast.

-
Place the pressed mooncakes into a baking tray and line the baking tray with a piece of parchment paper.

-
Preheat the oven to 185 degrees. Spray a layer of water on the surface of the mooncakes before baking in the oven. You don't need a lot of surface. When spraying water, spray it from the top of the mooncake.

-
Place the mooncakes in the middle rack of the oven and bake at 185 degrees for 5 minutes. Take them out and wait for them to cool before brushing on a thin layer of egg wash. You don’t need to brush them very thickly or the color will be too dark.

-
Continue to preheat the oven to 185 degrees and bake on the middle rack for 15-20 minutes. Once the crust is colored, it can be taken out of the oven. The color of the crust can be as dark or light as you like.

-
Finished product.
