Snowskin mooncake
Overview
How to cook Snowskin mooncake at home
Tags
Ingredients
Steps
-
Have all materials ready

-
Mix all the flour, add milk, and stir until a smooth batter without any lumps.

-
After mixing well, add condensed milk and cooking oil, and continue to stir patiently until the oil is completely absorbed by the batter.

-
Pour into a basin, steam over high heat for 25 minutes, turn off the heat and take out.

-
After taking out the dough, there will be a layer of oil on the surface. This is normal. We use a pair of chopsticks to stir the dough and set it aside to cool. (The basin is relatively hot at this time, so be careful)

-
After the dough is warm to the touch, we put on disposable gloves and start kneading the dough, completely kneading the oil that just floated on the surface into the dough. (Use a rubber spatula to easily remove the dough from the bowl)

-
The surface of the kneaded dough is smooth and grain-free.

-
Take a medium-sized plastic bag, put the dough in it, squeeze out the air inside, and let the plastic bag fit on the dough. Set aside.

-
Make cake flour: Pour 30G glutinous rice flour into a pan, turn on low heat and slowly stir it back and forth with a spatula, fry until the color turns slightly yellow, turn off the heat and pour into a clean bowl.

-
I use a 50G mooncake mold, and the ratio of fillings to dough is 1:1 (generally the filling is around 20-25G)

-
Divide the dough into 25G portions. (If you reduce the filling to 20G, then the dough will be 30G. In short, the final filling and dough combined will be 50G.

-
Take a piece of dough, put it on the palm of your hand, and press it slowly with your palm. Pay attention to pressing the skin a little thinner on the sides. Add the filling and slowly push it up with the tiger's mouth until the dough completely covers the filling.

-
Take a little cake flour in the palm of your hand and wrap the dough evenly. Be careful not to use too much cake powder, as it will affect the color of the finished product.

-
Put the dough just wrapped with cake flour into the mold and press it into shape. Don't use too much force, because if you use too much force, there will be an extra edge on the bottom of the mooncake.

-
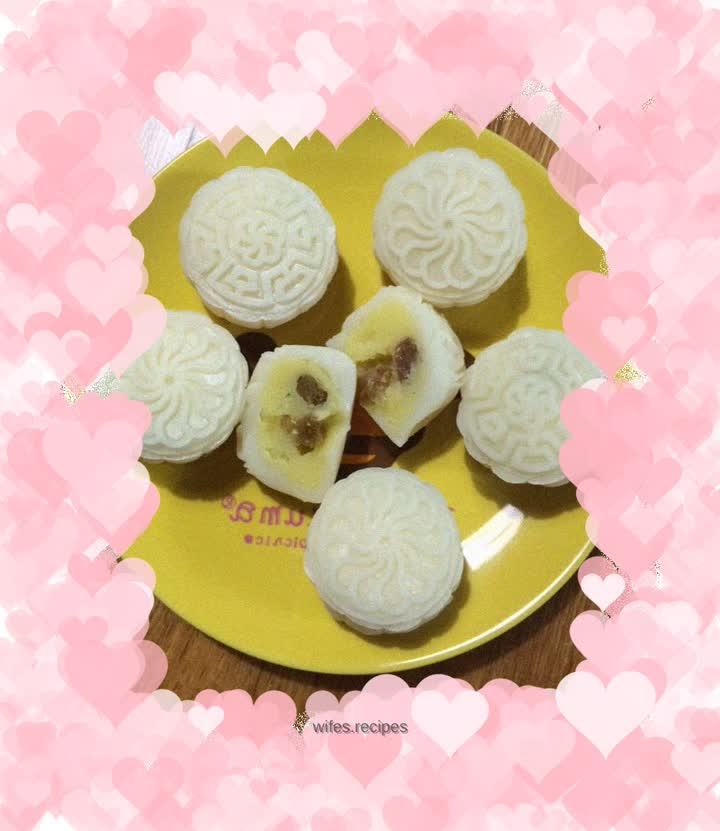
Finished product

-
If we want to give them to relatives and friends, we have to start packaging mooncakes. Take a 50G mooncake packaging box, put it in the cake base, sprinkle a little cake powder inside, put the mooncakes in, close the lid, and stick the two sides firmly with transparent tape.

-
Doesn’t this make you feel taller? ^_^

-
Attach beautiful stickers and put them in the box.

-
It’s finally finished, the beautiful snowskin mooncakes are ready.
