Rice Cooker Pizza
Overview
I have made pan pizza before, but this time I bought cheese and tried it with a rice cooker. A rice cooker will keep heat better than a pan, making it easier to melt cheese. Because the weather was cold and it took a long time to bake the noodles, it was already night for the Five-Year Plan, and the light was not very good for taking pictures. I was busy eating and didn’t take a good picture. The surface of the rice cooker cannot be colored, so it won’t look very good, but the taste is first-rate, and the cost is only about ten yuan. I never want to go to Pizza Hut again. The drawing effect is great when eating!
Tags
Ingredients
Steps
-
Weigh the flour, milk powder, sugar and salt and put them in a basin

-
Use about half the amount of warm water in the recipe to melt the dry yeast

-
Use your fingers to stir the dry ingredients together

-
Add the melted yeast water and the remaining water, and knead it into a dough. It is best not to add all the water at once. Leave about 10g and add an appropriate amount according to the softness and hardness of the dough.

-
Transfer the dough to the cutting board and knead until the film can be pulled out slightly, but the film is not yet tough

-
Add corn oil to the dough and continue kneading. The dough will be disgusting when you first add oil. Keep kneading and kneading, the oil will be absorbed by the dough and it will be fine. The original recipe uses 7g of olive oil

-
Just knead it until it reaches the expansion stage

-
Roll the dough into a ball, cover with plastic wrap and set aside to ferment.

-
It’s time to prepare the pizza toppings. Cut the red pepper into rings, cut the green pepper into small pieces, dice the chicken and ham, and blanch the peas.

-
Put no oil in the pan, add green and red peppers and fry them

-
When the green and red peppers are about 70 to 80% ripe, add peas and ham and fry them dry. Because using a rice cooker does not have the same dehydration effect as using an oven, you need to fry and dehydrate all the ingredients first.

-
Put a little oil in the pan and fry the minced meat. Add a little salt to taste

-
Dice onions and tomatoes

-
Sauté the minced garlic in a little oil until fragrant

-
Pour in diced tomatoes, sauté diced onions until soft, and then add an appropriate amount of tomato sauce. If you like sourness, you can add more. Pour a little more boiling water or stock, simmer until thick, and add a small amount of salt and black pepper. After sprinkling the black pepper, the aroma comes out immediately.

-
The dough has risen until it has doubled in size, and when you poke holes with flour in the dough without collapsing or shrinking, it is ready. Because it was cold, I did it for about two hours. .

-
Use a rolling pin to flatten the risen dough and deflate it

-
Roll into a ball and let rest for fifteen minutes. It was cold and I left it for more than 20 minutes

-
Roll the dough into a round cake with a thin middle and a thin edge, place it in the rice cooker pot, and poke holes with a fork to prevent the center from swelling due to heat

-
Spread a layer of cheese on the bottom of the cake, brush with the fried sauce, and then spread a layer of cheese

-
Put the fried peas, minced meat, ham, green peppers and red peppers, and then spread a layer of cheese. Don’t use up all the cheese, leave about 20g.

-
Cover the rice cooker and press the cook button. It will jump to keep warm for about 10 minutes. Turn off the power and open the lid and sprinkle the remaining cheese. Plug it in again and press the cook button again. It will jump to keep warm for 5 minutes. Just open the lid and watch the cheese melt

-
This is how it looks after opening the lid and adding cheese

-
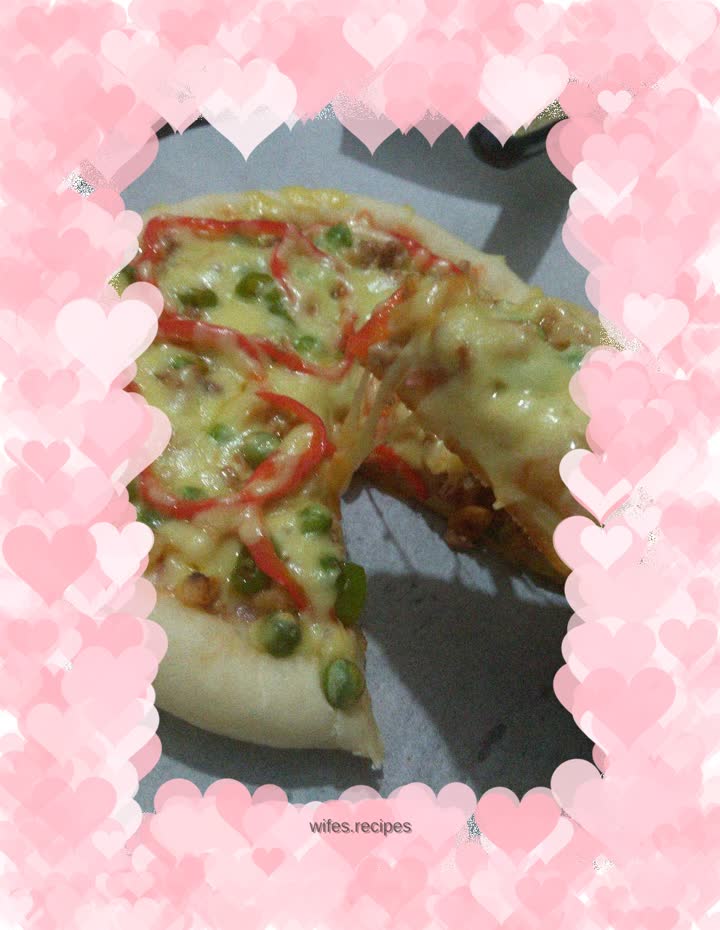
Finished product picture.

-
Eat it while it's hot, the drawing effect is super good
