Unique leaf coconut bread
Overview
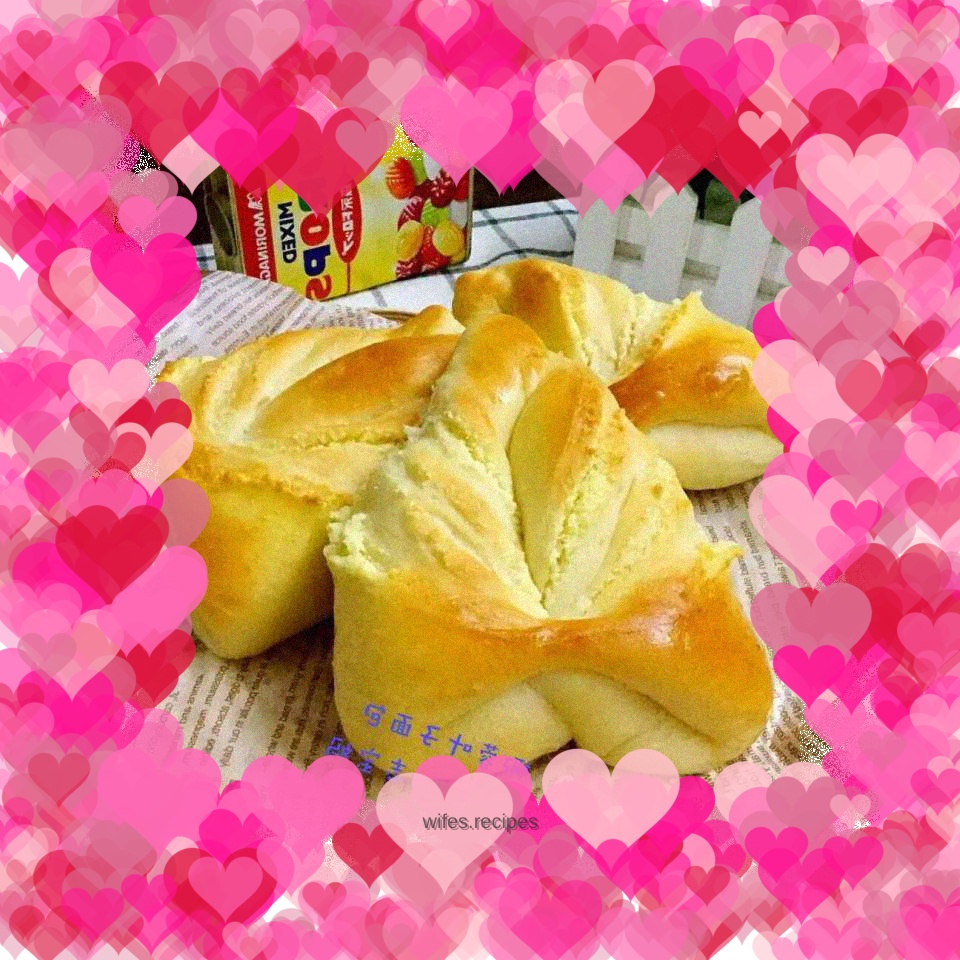
Last night I followed the trend and made this leaf coconut bread. There are two reasons. First, the leaves have a unique shape and I wanted to challenge it. Second, the coconut filling is very popular in my family. The finished bread is soft, sweet and tastes good! Let’s do it together!
Tags
Ingredients
Steps
-
Use chopsticks to mix the ingredients except butter and yeast. No need to form a ball. Let it sit for about half an hour. Then add yeast and start the bread machine to knead for two programs for 40 minutes. It will reach the fully expanded stage. The dough has good gluten and is not easy to tear. Add softened solid butter when kneading for 25 minutes and mix evenly.

-
Use the fermentation function of the bread machine to ferment the kneaded dough directly until it doubles in size. Dip your index finger into some water and poke a hole in the middle of the fermented dough. If the hole does not shrink or collapse, it means the fermentation is complete.

-
Take out the fermented dough, deflate it and roll it into a round shape, cover it with plastic wrap and let it rest for ten minutes.

-
Prepare the coconut filling, soften the butter, add fine sugar and beat with a manual egg beater until the volume expands and the color becomes lighter. Then add the egg liquid in batches and beat evenly. Each time you add the egg liquid, stir well before adding the next one. Otherwise, the oil and water will easily separate. Finally, add the coconut milk and milk powder, mix well, divide into eight portions and knead into balls for later use.

-
Divide the rested dough into eight portions, roll into balls, cover with plastic wrap and rest for 15 minutes.

-
Use your hands to pat out the air bubbles in the small dough and wrap it in the coconut filling.

-
After all the dough is wrapped with fillings, roll it into an oval shape. Pay attention to the rolling technique, roll it from the middle up, and then roll it from the middle down.

-
After rolling it out, fold it in half from one side to the middle, and overlap the other side on top.

-
Grease the knife and make a cut from top to bottom, leaving space at both ends so as not to cut them off.

-
Pass the top downward through the hole and pull upward, turn it over and shape it.

-
Place on the baking sheet for secondary fermentation. The room temperature is now more than 20 degrees. There is no need to turn on the oven fermentation function. Just put a bowl of hot water and close the oven door for fermentation.

-
At the end of the second batch, preheat the oven at 200 degrees. Use a soft brush to brush the fermented bread dough with a thin layer of egg liquid. After the oven is preheated, place it in a baking pan and bake it. Adjust the temperature to 175 degrees and bake for about 20 minutes.

-
Pay attention to the condition. After the surface is colored, cover it with tin foil in time or lower the heating temperature. After it is baked, you can brush a layer of honey water to make the color more beautiful. Honey and water are 1:1, or you don’t need to brush it. Move the bread to the baking grid to cool. After it is cool, it can be bagged and sealed at room temperature. If you make too much and you won’t be able to finish it, you can freeze it and reheat it when you eat it.

-
I habitually pose for photos. Isn’t the finished product very beautiful?
