Birthday cake----------Finger cake cherry cake
Overview
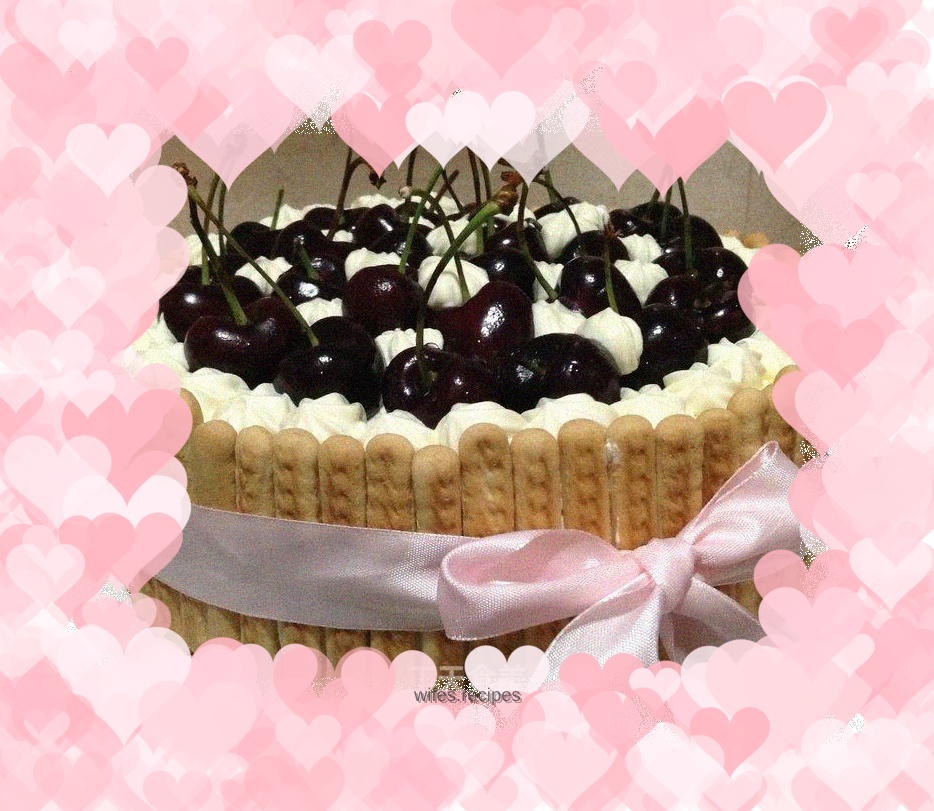
A birthday gift for a cute little sister, she was very happy!
Tags
Ingredients
Steps
-
Weigh the various ingredients and separate the egg yolks and protein; add 20 grams of sugar to the egg yolks and mix well, add corn oil and mix well, add milk and mix well.

-
Sift in the flour and mix evenly with a rubber spatula.

-
Set aside the prepared egg yolk batter.

-
Beat the egg whites at low speed until bubbles form and add 20 grams of sugar.

-
Continue beating until thick peaks form, add 20 grams of sugar again, and turn to medium speed.

-
When the protein paste is thicker and lines appear on the surface, add the remaining 20 grams of sugar and beat at high speed.

-
When the egg beater is lifted and triangular tiles appear, the egg whites have been beaten. The beaten egg whites will be solid and creamy. When a chopstick is inserted, it will not tilt. (At this time, preheat the oven to 150 degrees, with upper and lower heat)

-
Use a spatula to add about one-third of the egg whites into the egg yolk paste, and stir evenly using a stir-fry technique

-
Pour the prepared egg yolk paste back into the egg white paste and fold evenly using the same technique.

-
Pour the prepared batter into an 8-inch round mold, place the middle and lower layers, and bake at 150 degrees for 1 hour.

-
Immediately after taking it out of the oven, turn it upside down and remove from the mold when it is completely cool.

-
Take the whipped cream out of the refrigerator, put a large bowl of water and frozen ice packs into it, place the egg beater in the ice bag, and beat the whipped cream.

-
First beat at low speed until rough peaks form. Add 30 grams of sugar. Turn to medium speed and beat until the cream begins to show obvious lines. At this time, turn to low speed and continue beating. Lift the whisk and stop beating when short sharp corners appear. At this time, the cream will be solid and cannot flow.

-
When the cake is completely cool, unmold it and divide it into 2 pieces with the help of a deeper plate. (I was so busy with the following steps that I forgot to take pictures)

-
Place the sliced cake on the decorating table for the buttercream operation. This cake does not require the cake base to be smoothed. It doesn’t matter if it is uneven for us novice decorators. The finger cakes can be well concealed without losing appearance.

-
Surround the cake with finger biscuits, place cherries from the middle, and finally squeeze a circle of small flowers on the sides, and a beautiful cake is born.
