Bear Bread
Overview
In the spring season, I take my baby on spring outings on weekends. Bread and cakes are indispensable. This time, my baby does it by himself and has a good time graffiti on the bread. Haha, with various expressions, it looks very cute. There are always inherent steps in making bread. When it comes to shaping, you can show off your skills and use them as you like. This is where the fun of baking lies. The red panda made today is easy to plastic surgery, let’s take a look below.
Tags
Ingredients
Steps
-
Put the milk in the microwave and heat it to about 35 degrees, add the yeast and let it sit for 5 minutes

-
Pour the milk with yeast into the bread machine bucket, then add the whole egg liquid, white sugar, high-gluten flour, and salt in sequence

-
Start quick dough kneading

-
The two quick dough kneading procedures last for 40 minutes, kneading until the fascia can be pulled out

-
Ferment until 2.5 times the original size

-
Knead it thoroughly to deflate it, then cover it with plastic wrap and let it rest for ten minutes

-
Divide the dough into the main body dough of the bear’s head and the dough for the ears

-
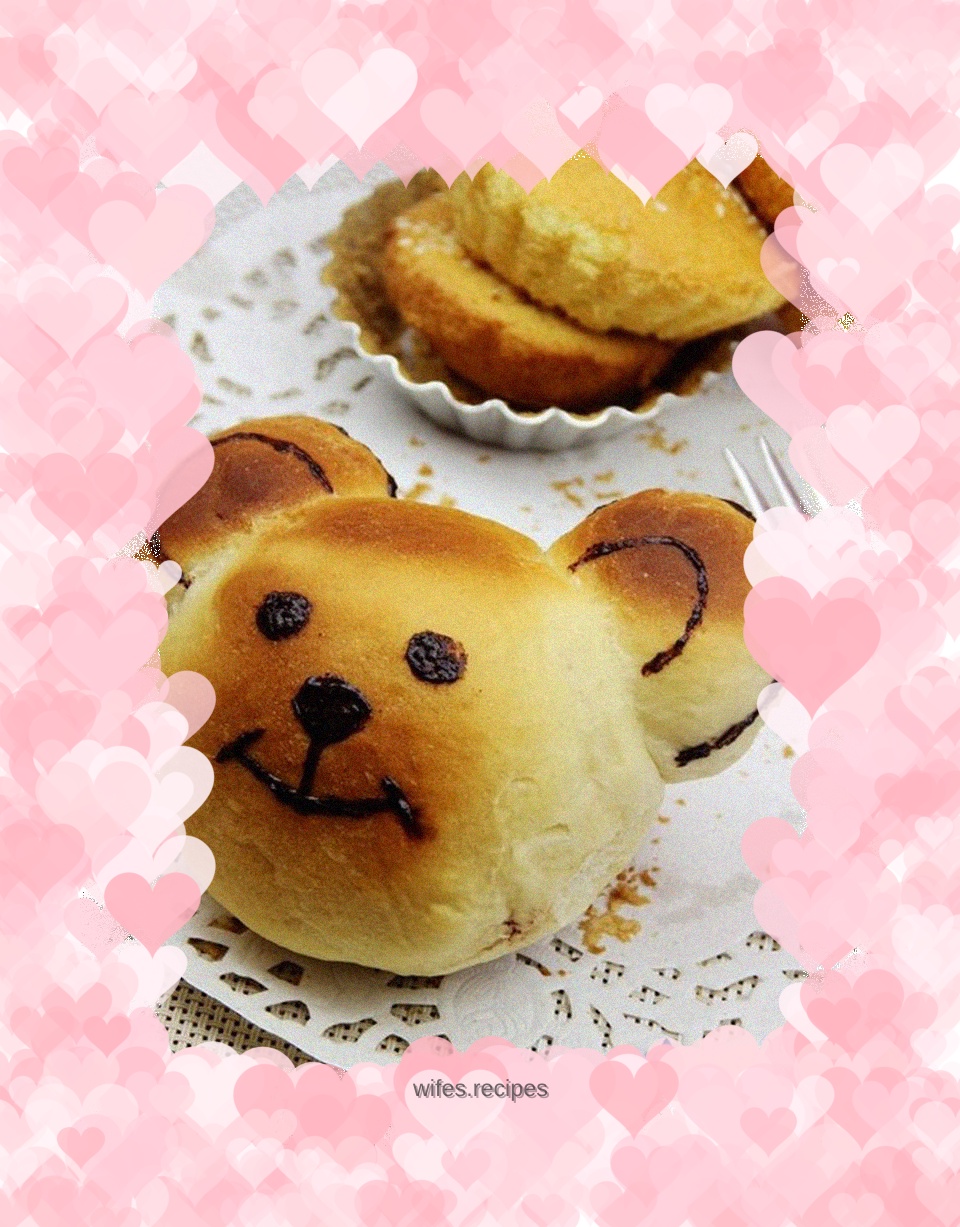
Make it into the shape of a bear as shown in the picture

-
Place on a baking sheet lined with baking paper, spaced widely

-
Place in the middle rack of the preheated oven and wait until it has doubled in size again, then turn the heat up and down, 180 degrees, for 16 minutes

-
Add appropriate amount of honey to cocoa powder and make a paste

-
Use a toothpick dipped in cocoa paste to draw the bear’s facial features

-
Cute bear bread is ready
