Bread machine version rice sponge cake
Overview
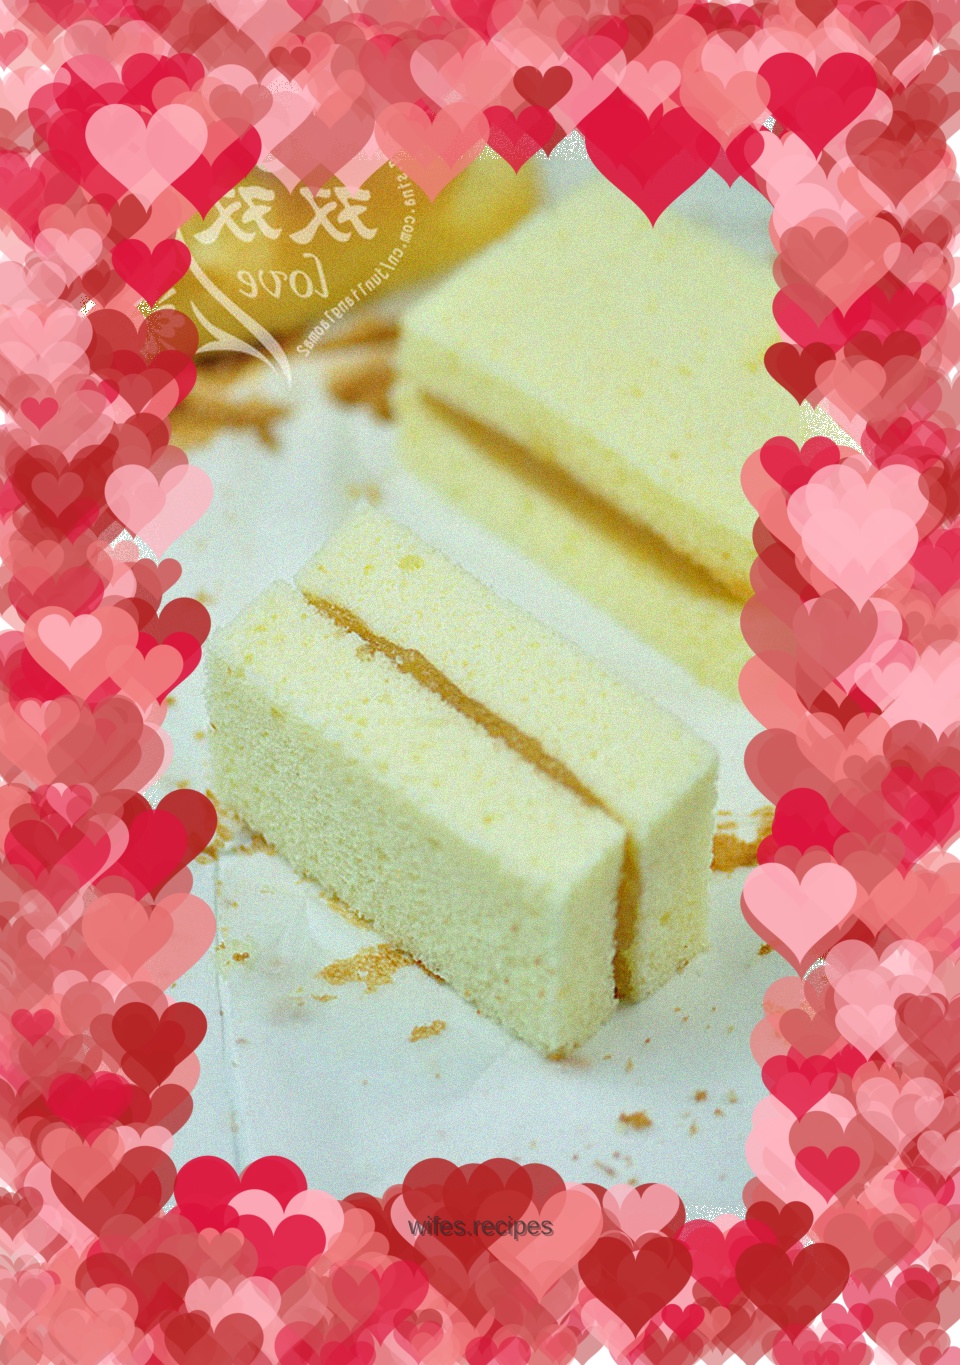
The recipe was found online. I made changes to the recipe from a Japanese master, Mr. Kojima. I have to say that the master-level shot is extraordinary. After all the changes I made, it was still so successful. It really brought tears to my eyes! Shuangshuang originally tried the master's recipe, but most of it removed Shui Yi, which he didn't have at home. However, it just so happens that since I haven’t made cakes for a long time, I don’t have low-gluten flour at home, although I can use cornstarch and all-purpose flour. However, both of them wanted to try other versions. Rice flour should have no gluten, right? It’s even lower-gluten than low-gluten. Okay, I’ll try this. Also, I love the aroma of this rice flour! By the way, someone said to me, you are really bold. Actually, it doesn’t matter. It doesn’t mean you can’t eat it if it’s spoiled. Why not give it a try?
Tags
Ingredients
Steps
-
First, compare the oil paper to the size of the bread bucket and fold it on all sides.

-
Compare the size while stacking, and make modifications.

-
Open it and cut it with scissors in this way.

-
Place parchment paper into the bread pan. (Since the bread barrel is not a square shape, it is a little wrinkled and ugly)

-
Crack the eggs into the bucket of a chef's machine and add the sugar.

-
Turn on the kitchen mixer and beat eggs at high speed 6.

-
Beat until you lift the mixer head and the egg batter drips with obvious lines that do not disappear quickly.

-
Replace the mixing head of the chef's machine, sift in the rice flour in batches, and mix evenly. (I sift it in three times to avoid sifting it in once and stirring and defoaming)

-
While stirring, pour the milk and salad oil in portions along the wall of the barrel.

-
Mix well.

-
If you use a whisk to beat it, when it's cold, you can put it in warm water and beat it in hot water. The egg beater has less power than a chef's machine, so beat slowly and don't rush. Pour the beaten egg mixture into the bread pan.

-
Turn on the baking function and set the time to 50 minutes. (Actually, it took me 40 minutes, and I had to adjust it according to the temperature difference of my personal bread machine)

-
In the middle, I found that the cake body obviously started to grow taller.

-
Observe the state of the cake, the edges are beautifully brown.

-
Find a knitting needle (metal, fast heat conductor), quickly insert it from the center of the cake, and pull it out. If the top is clean and hot when you touch it, it means the cake is cooked. This method is from an Italian cooking book and is used by many people.

-
When the cake was ready, my machine showed 11 minutes left, that is, it took a total of 39 minutes to bake. There is also a certain temperature difference in the baking of the bread machine, which cannot be determined uniformly. Just observe it with your eyes.

-
Take out the cake and place it on a drying net to cool.
