Rilakkuma Japanese Burger
Overview
I made breakfast for several days and posted it on WeChat Moments, which is definitely a great tool for attracting likes! What's more, it's easy to make fried chicken! And it’s a magical breakfast to coax your baby~ If you like my recipes, please follow me. I will launch creative recipes every week, don’t miss it~
Tags
Ingredients
Steps
-
First, mince the beef and pork in various ways. The ratio of meat here is 3:1, and the taste is better. If it is pure beef, the texture will be harder, and if it is pure pork, it will taste greasy. Let’s try this ratio.

-
Then, stir-fry the diced onions until they are half cooked. I used green onions here, which have a sweeter taste.

-
Add salt and pepper

-
I like to mix it evenly with my hands, which is faster, until the meat is smooth and pulpy. Maybe because I used a food processor to grind the meat, it became pulpy very quickly! This way it won't get loose easily. I would suggest that the taste be a little stronger and paired with the sweet cheese and salad dressing at the end to neutralize the salty taste and make it more delicious.

-
Add water to the bread crumbs, soak briefly, and immediately add to the meat sauce.

-
Add egg white

-
Add fried onions

-
Add tomato paste

-
Mix well

-
Divide the meat sauce into four equal portions, making sure the shape is a little larger than the hamburger buns because the meat will shrink back when frying.

-
It's best to use a non-stick pan to fry the steak and sliced onions.

-
Then put the bread in the oven at 180 degrees and bake for 5 minutes. It is not recommended to do this step in advance, because if you let it cool for too long, the bread will easily become soft and tough. Even if you leave it in the oven for too long after baking, it will become too hard.

-
Start assembling!

-
Add tomato slices

-
Put steak

-
Put onions

-
Put cheese slices

-
If you can’t wait to try it, you can eat it now. But I like to do a little decoration.

-
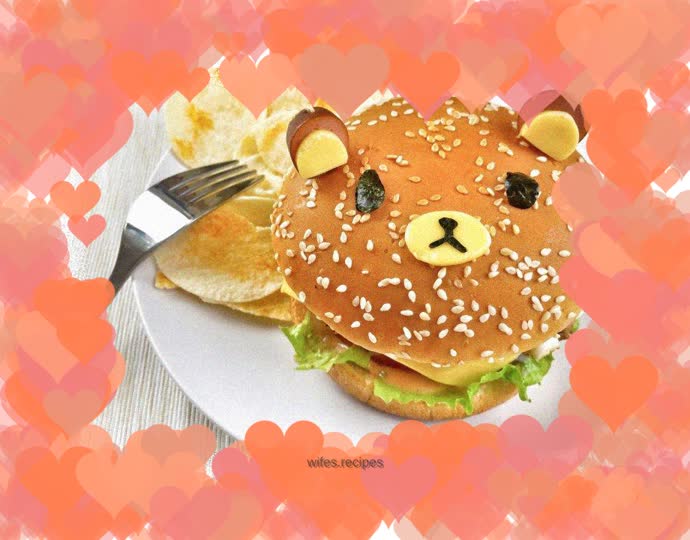
Cut the crispy sausage into appropriate thickness and make ears.

-
On the cheese slice, use a round cutting die to cut out two circles for the shadows of the ears. Then use an oval cutting die to cut out the nose. If you don't have a cutting die, just use scissors.

-
Cut out oval-shaped eyes and mouth shapes on the seaweed.

-
Assembled

-
Finally, use toothpicks to fix the position of the ears, and you're done!

-
Of course, the mouth can be made into different shapes, so feel free to use it.
