pan cake
Overview
This pan version of the small cake is similar to a chiffon cake, with a very soft and delicate texture and not much added sugar. It can be added to babies over 1 year old, even older babies or adults are suitable to eat. Small cakes are suitable for breakfast or afternoon snacks. They can also be used as a snack when taking the baby out to play, or as a snack when there are children at home. The small cakes are delicious and super easy to make. You don’t need a big oven or waiting time to preheat, you can easily make them with just one pan! As long as you master the production method proficiently, mothers can make it in ten minutes!
Tags
Ingredients
Steps
-
Take an egg and separate the egg white and yolk.

-
Add formula milk to egg yolks, then add cooking oil, sift in low-gluten flour, and stir everything evenly and finely. The mixed egg yolk paste is thick and easy to slide off

-
.Add the sugar to the egg whites in three batches and beat. Add sugar for the first time and beat until it looks like coarse fish eyes; add sugar for the second time and beat into wet foam; add sugar for the third time and beat until it looks like a pair of small peaks. PS: The small peaks are two obvious upward pointed tips that can be seen in the protein after the stirring rod is lifted.

-
Take 1/3 of the beaten egg whites, add it to the egg yolk paste, and mix while turning. Pour the evenly mixed egg yolk paste back into the remaining 2/3 of the egg whites, and continue to mix while turning in circles until it becomes thick and difficult to slide off. 5. Brush oil on the pan first (do not turn on the heat at this step), pour in and stir. PS: When brushing oil, brush the bottom and sides of the pan

-
Turn on low heat, cover the pot and simmer for about 2 minutes. When you see small holes appearing on the surface of the cake and it has solidified, you can turn it over. PS: Be careful when lifting the cake to avoid breaking it by moving too much or too quickly.

-
Mommies, just fry the bottom until it has a slightly golden color, so as not to fry for too long and burn the pan. PS: Let me remind you again, the whole process is on fire. 8. After one side is fried, turn over and fry for about 1 minute. 9. The frying time after turning over should not be too long, as long as it is solidified and cooked. Turn off the heat immediately and simmer for 2 minutes with residual heat. PS: The thickness of the cakes you make may vary. If it is very thick, it is recommended to extend the frying time by 0.5 to 1 minute on both sides, but remember to occasionally look at the bottom during the process to avoid burning the pan. There are no matching lids for the pans, even if you use a large lid

-
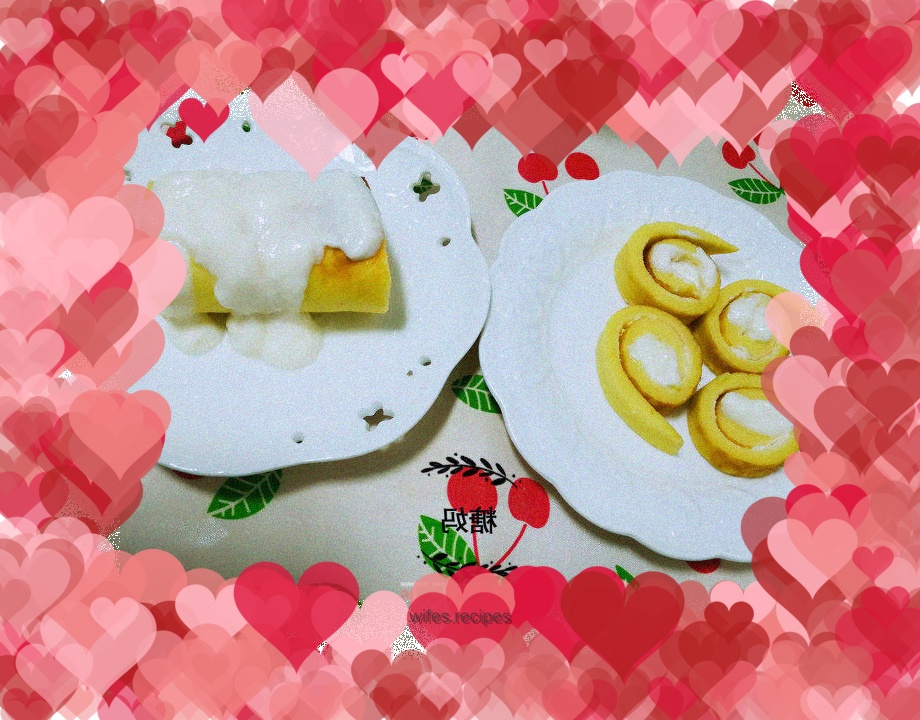
Pour the prepared cake directly onto the silicone paper and coat with a little yogurt. PS: The amount of yogurt should be less. Don’t apply too much at one time, otherwise the excess yogurt will be squeezed out when you roll it

-
Roll up while hot. Use silicone paper to push the cake while rolling. PS: Roll the cake as tightly as possible. If the roll is too loose, the sides will be loose and unsightly.

-
After rolling the cake roll, wrap it tightly with silicone paper, twist the two sides to fix it like wrapping candy, and set it for half an hour

-
After the cake roll has cooled naturally, untie the silicone paper and you can slice it.
