Double assemblage of cold cuts
Overview
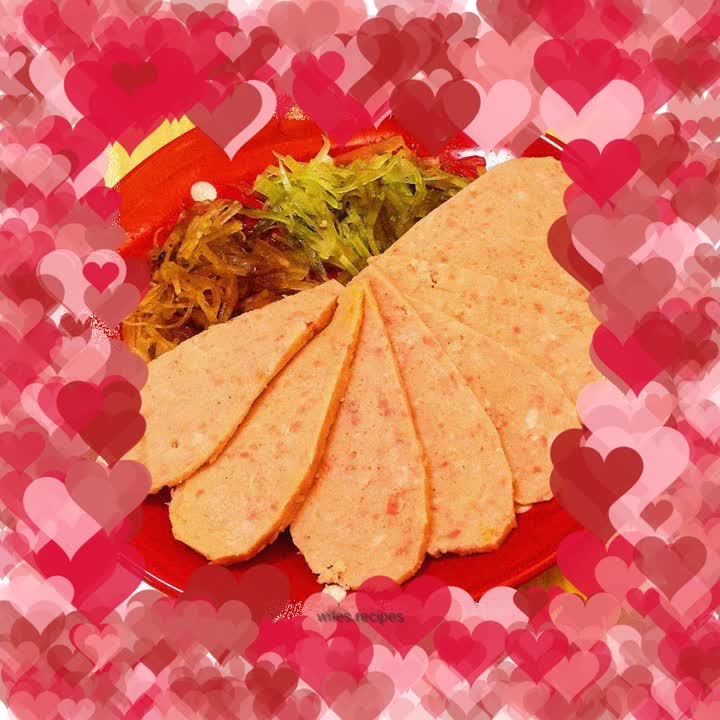
This is a cold dish that combines knife skills. Use knife skills to cut the radish and lettuce into very thin shreds. Then use seasoning to make the radish shreds into black bean and chili flavor, and the lettuce shreds into sweet and sour flavor. Cut the lunch meat into even thin slices and half-cover the two flavor shreds
Tags
Ingredients
Steps
-
Prepare radish and lettuce, peel lettuce

-
Cut radish into sections

-
Peel the radish with a knife

-
Slice the radish crosswise with a knife

-
Arrange the thinly sliced radish slices half-overlapping on the cutting board

-
Use a knife to quickly cut into strips

-
The thickness of radish shreds is as shown in the picture

-
Place radish shreds on the left side of the plate

-
Then process the lettuce, remove the older part of the outer ring, and trim it into the shape of the lower left corner in the picture

-
Cut the lettuce into thin slices crosswise in the same way

-
Then use the same method to cut the lettuce into thin strips

-
The thickness of lettuce shreds is as shown in the picture

-
Place the lettuce shreds on the right side of the plate

-
Pour a little light soy sauce on the radish shreds and the lettuce shreds respectively, drizzle a little vinegar and sesame oil on the lettuce shreds, and sprinkle with a little sugar. Pour a little chili oil and tempeh on the shredded radish, and mix them separately (not yet mixed in the picture)

-
Prepare lunch meat

-
Trim lunch meat with a knife

-
Cut the lunch meat into evenly thin slices

-
The thickness of lunch is as shown in the picture, the thickness is the same from front to back

-
Cover the lunch meat on the two kinds of filaments and start eating
