Cantaloupe Cream Cake
Overview
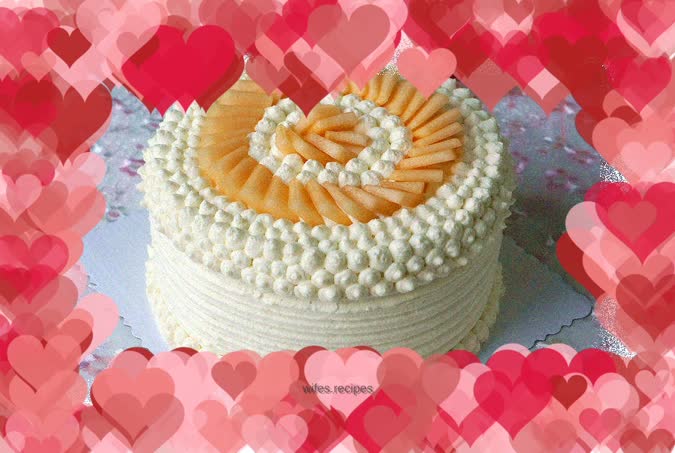
The basic chiffon cake is sandwiched with cantaloupe cream, and only whipped cream is applied on the outside. It is too plain. Then try some cantaloupe slices, which will enrich the color. For people with chromophobia, using the natural color of the fruit to match it is indeed a good choice.
Tags
Ingredients
Steps
-
The ingredients for an 8-inch chiffon cake are ready. I need to make two 8-inch chiffon cakes respectively. I actually used one and a half cakes. Because the oven is small, I have to make them twice separately

-
Separate the egg white and egg yolk, and put the egg white into a basin without oil and water

-
Beat the egg yolks, add sugar, and beat until the sugar dissolves

-
Add corn oil and mix well

-
Pour in milk and mix well

-
Sift in low-gluten flour and stir evenly without any dry powder particles

-
When the egg whites are foaming, add one-third of the sugar, then turn to high speed and add the second and third times of sugar when the egg whites are foaming finely and have obvious textures

-
Lift the egg beater and it will be ready when the egg whites are close to small straight peaks. This is the egg white paste

-
Add one-third of the egg white batter into the egg yolk batter and mix evenly; at this time, start preheating the oven to 140 degrees

-
Pour the mixed batter back into the egg white batter basin and continue to mix gently and quickly until it becomes a smooth, delicate and shiny cake batter

-
Pour the cake batter into an 8-inch mold and shake it a few times to release big bubbles

-
Put into the preheated oven, 140 degrees, middle layer, upper and lower heat, 60 minutes

-
Take it out of the oven and shake it a few times to release excess heat from the cake

-
Place upside down on a drying rack and let cool completely before unmoulding

-
Make the other cake as well. Let both of them cool before they are ready. Check the height and make some ideas

-
Cut an appropriate amount of cantaloupe into small dices for filling, and cut the other part into slices for surface decoration

-
Cut the two cakes in half horizontally

-
Whip the whipping cream as you go. Do not whip it out all at once as it will melt easily. The whipping cream should be refrigerated for at least 12 hours before use

-
Beat the sandwiched cream until it reaches 9 and distribute it

-
A layer of cake, a layer of cream, a layer of cantaloupe diced, a layer of cream, complete the first layer of the cake in this order

-
Complete the second layer in this order, and finally cover the top layer of the third layer

-
After completing all the cake fillings and spreading, re-whip the cream to 8 portions, use small and medium round piping tips, and put the cream into a bag

-
Decorate the surface according to your own ideas, put cantaloupe slices on the top, and the cake is finished

-
It's very fresh and refreshing to eat by yourself or as a gift. Look, you can make an elegant and pleasant butter-decorated cake without adding any coloring.
