Japanese-style baked confectionery
Overview
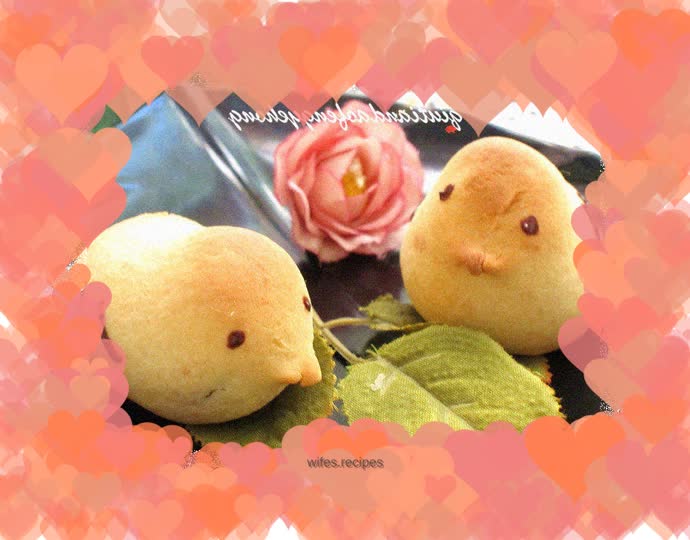
I particularly like the shape of this cute little chicken. It is cute and lifelike. I made the finished product and showed it to my husband. He asked me if it was a bird. No matter what it is, I like it very much anyway, and as soon as I posted the picture to the circle of friends, everyone praised it for being cute and praising the beautiful production. I feel very happy to receive everyone's praise. The ingredients for this roasted fruit are very simple, and the preparation is not very complicated. Personally, I think this dessert has no added oil, just condensed milk. If the sweetness is not very high, it is suitable for many people. This is one of the reasons why I like it. I refrigerated it twice during the production. I mixed the ingredients and put them in the refrigerator for 20 minutes. Then I kneaded the dough, covered it with plastic wrap, and put it in the refrigerator for another 30 minutes. The dough did not stick to my hands at all and was easy to operate. What I am not satisfied with is that in order to save trouble, I baked it first and then painted it with melted chocolate. It is easy to contaminate other places and it does not look very clean. It is still recommended that you use the cocoa powder method to paint first and then bake it. Two environments and lights were used for this photo shoot, and the colors presented in the pictures are also different. The colors under natural light are more vivid; while the finished products under strong light are lighter in color and feel softer.
Tags
Ingredients
Steps
-
Prepare the materials

-
Put the egg yolks into the container

-
Add condensed milk;

-
Mix condensed milk and egg yolks evenly

-
Mix the baking powder and cake flour, sift and add to the condensed milk;

-
Stir to mix

-
Then knead the dough. If it feels too sticky, dip your hands in a little hand flour;

-
Cover with plastic wrap and refrigerate for 30 minutes;

-
Take it out from the refrigerator and cut it into pieces of about 20g each and roll them into rounds; divide the prepared red bean filling into equal portions;

-
Take a piece of dough, press it into a dough sheet with your hands, and add red bean filling;

-
Tuck the tiger's mouth into a round shape;

-
Make all the dough

-
A chicken-shaped head squeezes out of the tiger's mouth;

-
Then pinch out a pointed mouth;

-
Make them all one by one and preheat the oven to 170℃.

-
Place everything on the baking sheet and bake for 20 minutes until the surface is colored.

-
Melt the chocolate in hot water; use a toothpick dipped in the chocolate liquid to draw eyes and feathers;
