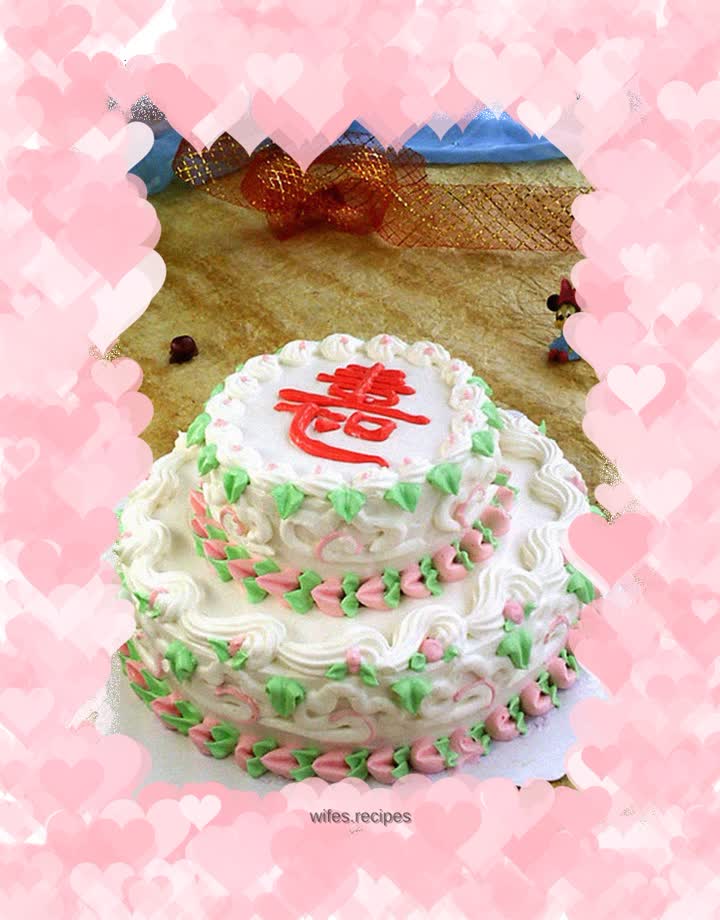
Decorated cake: Xiangyun Tuoshou
Overview
This cake was ordered as early as January after I delivered my first birthday cake. I never mentioned it again, thinking it was a dirty deal. Unexpectedly, a month later, it would be brought up again. Of course, the cake given to the elderly must be birthday cakes. The auspicious clouds for longevity are actually the word longevity on the auspicious cloud pattern. It's a bit difficult to specify double layers. Our family only has 8-inch and 6-inch models. To be honest, if the 6-inch model is squatting on the 8-inch model, the ratio is really not very good. I wanted to be lazy, so I would be more prudent. However, this is not just a matter of a stocky body. When squatting from 6 inches to 8 inches, the distance between the 8-inch top edge and the 6-inch bottom edge is too small. If you want to make an inner and outer ring lace, it will be too crowded, and all the initial ideas have to be rejected. In the end, I decided to change the size to 6 inches. You don’t need to cut too much, just 4.5 inches. The first time I made a double layer, I lost 10,000 yuan of caution. I'm always worried that the lower layer will be damaged when I apply the dough on the upper layer of the cake. I'm afraid that something will happen, but fortunately the damage is not too deep and it can basically be covered up when piping flowers. There was no detailed plan for this cake, and many details were constantly added in during subsequent operations. In fact, the most important purpose of those details is to use up as much whipped cream as possible.
Tags
Ingredients
Steps
-
Chiffon cake base

-
Flatten the top of the cake and remove the burnt skin

-
Cut the 6-inch cake into 4.5-inch rounds

-
Cut the two cakes into two slices

-
Buttercream and decorating tools

-
Add butter and sugar and beat into a cocktail

-
Cut the two cakes into two pieces, spread the filling cream on the big and small cakes respectively, and close the other piece

-
Place the 8-inch cake on the turntable and spread

-
Smooth the top and sides as much as possible

-
Place the 4.5-inch cake in the center of the 8-inch cake and spread

-
Finished

-
Use a sharp-toothed nozzle to extrude a wave pattern on the top edge of the 8-inch cake

-
Pipe comma lines on the top edge of the 4.5-inch cake

-
Extrude the auspicious cloud pattern on the upper 2/3 of the side of the 8-inch cake

-
Extrude the auspicious moiré pattern on the upper 2/3 of the 4.5-inch cake that is opposite to the lower layer

-
Mix the red cream and squeeze out the peach blossoms with the peach blossom nozzle on the upper and lower sides

-
Change to a thin mounting bag and put a small red dot on the center of the 4.5-inch comma pattern spiral.

-
Draw an edge on the inside of the auspicious cloud pattern on the upper and lower sides

-
8-inch hollow ball extruded from the wave

-
Mix green cream and use a leaf nozzle to squeeze out leaves on the upper and lower layers of longevity peaches

-
Small green leaves are squeezed on both sides of the small ball hollowed out by the waves

-
Squeeze a leaf between each comma at the top

-
A leaf squeezed out from the junction of 8-inch waves

-
Turn up the red cream and write the Chinese character longevity in the center of the top

-
Complete
