Red Velvet Cake Roll
Overview
Red Velvet Cake Even without makeup and without any props, it is still beautiful. No wonder it has been popular for a century. Compared with the recipes I have made before, whether it is the taste or appearance, I still think this recipe I tried is the best! The real red velvet cake is made from red velvet liquid, not red yeast powder + cocoa powder. The color of red velvet liquid cannot be given by red yeast powder! Red velvet liquid has no taste like red yeast rice powder! If you don’t have the original liquid, you can use red yeast powder instead, but the original liquid has a unique taste that red yeast powder doesn’t have! Adding some cocoa powder adds more flavor to the cake. I have tried this recipe several times, from the cheese version to the butter version, and this cake roll is also my favorite! Therefore, the real red velvet cake is noble and stunning
Tags
Ingredients
Steps
-
Prepare the ingredients in advance to avoid being rushed when making

-
Put corn oil into a basin, heat until fine texture, turn off the heat

-
Pour the low-gluten flour sifted in advance into the basin

-
Mix well and set aside to cool

-
Sift the cocoa powder into the milk and mix well

-
Pour in red velvet stock solution

-
Mix well

-
Pour into the cooled batter

-
Add 4 egg yolks and mix well (I forgot to take a picture of this step)

-
When separating egg yolk and protein, first put the egg white into a small bowl to avoid loose egg yolk falling into the egg white

-
Pour all the separated egg whites into the egg beating basin

-
Pour all the fine sugar and salt into the egg whites (now preheat the oven to 160 degrees)

-
Use your hands to gently stir the sugar and egg whites for a few times until the sugar melts

-
Use an electric mixer to beat the egg whites

-
Just send it to a small hook state

-
Sift the red velvet batter into the egg whites. Sifting will help filter out the particles in the batter to avoid affecting the taste

-
The batter after sifting is more delicate

-
First use a whisk or manual whisk to mix. Follow the direction in the picture. While mixing with your right hand clockwise, turn the egg bowl clockwise with your left hand. Mix for about ten times. Then use a silicone knife to evenly mix the batter on the sides of the bowl and the bottom cloth of the bowl

-
Pour into the gold plate from a height of 20 cm and remove large air bubbles

-
Level it, pat the bottom of the baking pan a few times with your hands to pop out any air bubbles, put it in the preheated oven, set the upper and lower heat to 160 degrees, middle and lower layers, and bake for 18 minutes

-
Remember to open the oven door during baking

-
Don’t turn it upside down when you take it out of the oven, set it aside to cool

-
After the cake embryo is cooled, place it upside down on the oil paper, and the cake embryo will slowly fall naturally. If you are in a hurry, after inverting the cake embryo, slowly unmold the cake embryo with your hands or tools

-
Beat the light cream and sugar until stiff

-
Spread evenly on the cake base

-
Roll up

-
Cut off the irregular parts on both sides

-
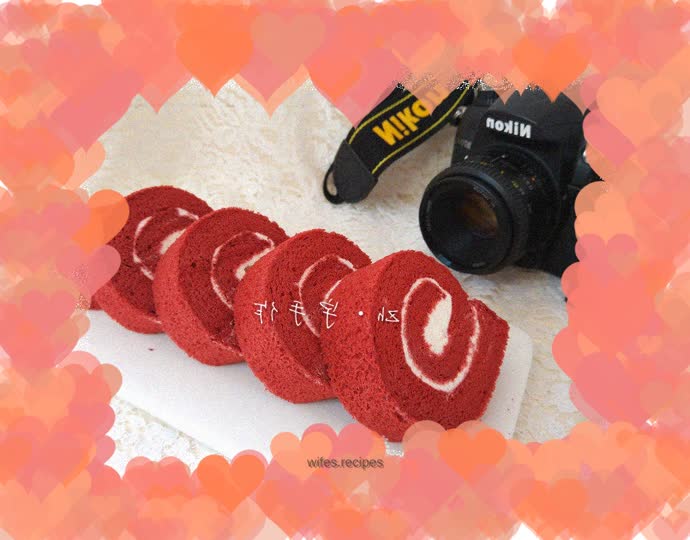
Cut into pieces and ready to eat

-
Very beautiful

-
The color is amazing and tastes good
