Whipped cream ladybug cake
Overview
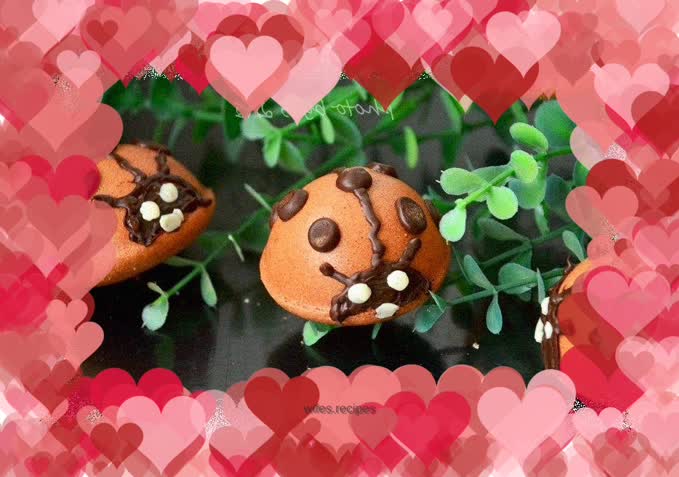
I have never made lollipops with the newly purchased Xuechu lollipop mold, but I always use it to make small cakes for babies. The resulting small cakes are very convenient for babies to grab two with one hand. The main ingredient for today's small cake is whipped cream. I plan to draw a ladybug, so I added a little red yeast powder. As a result, when I was painting, the weather was cold and the temperature was low, so the melted chocolate solidified in a short time, making the painting very ugly. Fortunately, the little guy liked it and left a few unpainted ones. He ignored them at all and only picked out the painted ones to eat. Although the painting is ugly, the recipe of this cake is very good, the milky fragrance is full, and the taste is very good.
Tags
Ingredients
Steps
-
Separate the egg whites and yolks, put the egg whites and whipping cream into a basin, and add 5 grams of sugar

-
Stir thoroughly

-
Mix red yeast rice powder and cake flour

-
Sieve twice to mix thoroughly

-
Sift into the custard

-
Stir until there is no dry powder

-
Place the egg whites in an oil-free and water-free basin and add a few drops of lemon juice. I cut a thin slice and squeezed out the juice

-
Add 25 grams of sugar in three batches,

-
Whip until dry peaks form. The whisk has a straight tip in advance

-
Take 1/3 of the egg white and put it into the egg yolk paste, and mix evenly using the stirring technique

-
Pour the evenly mixed batter into the remaining egg whites

-
Mix evenly by stirring, and then put it into a piping bag

-
Extruded into the mold

-
Preheat the oven to 140 degrees and bake for 20 minutes. Since one egg at a time is enough for the lollipop mold, I used two molds at the same time.

-
Baked small cakes

-
Put the black and white chocolate into piping bags respectively, melt them with warm water and cut the edges to draw a ladybug pattern.

-
The small cake without paintings is round and cute, with a soft texture and a rich milky flavor. It is a very delicious cake.
