The green flavor on the tip of the tongue - Matcha cake roll

The green flavor on the tip of the tongue - Matcha cake roll

Overview

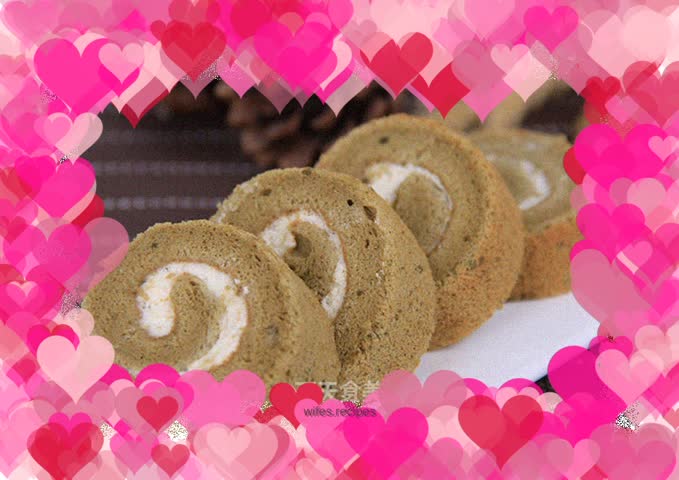
Cake roll is a favorite dessert for many people, especially its soft and tender texture, which is simply addictive. Add in the dazzling cranberries, and the whole product is soft and sweet, not to mention how delicious it is. Foodies may wish to give it a try. As long as you follow the correct steps, it is not difficult at all to make good cake rolls~~

Tags

Ingredients

Steps

  1. Prepare all the ingredients

    The green flavor on the tip of the tongue - Matcha cake roll step 1
  2. Ingredients for fillings

    The green flavor on the tip of the tongue - Matcha cake roll step 2
  3. 90g egg yolk + 20g fine sugar, beat well with a manual egg beater, do not beat

    The green flavor on the tip of the tongue - Matcha cake roll step 3
  4. Add milk

    The green flavor on the tip of the tongue - Matcha cake roll step 4
  5. Add salad oil and mix well

    The green flavor on the tip of the tongue - Matcha cake roll step 5
  6. Sift together low-gluten flour and matcha powder

    The green flavor on the tip of the tongue - Matcha cake roll step 6
  7. Use a rubber spatula to gently mix it up and down, but do not overmix to avoid stiffening

    The green flavor on the tip of the tongue - Matcha cake roll step 7
  8. Put the egg whites into another basin

    The green flavor on the tip of the tongue - Matcha cake roll step 8
  9. Beat the egg whites slowly with an electric mixer until large bubbles appear, add 1/3 of the fine sand

    The green flavor on the tip of the tongue - Matcha cake roll step 9
  10. Beat the egg whites until they become foamy, then add 1/3 of the sugar and beat at high speed

    The green flavor on the tip of the tongue - Matcha cake roll step 10
  11. When the egg whites are thickened, add the remaining 1/3 of the sugar

    The green flavor on the tip of the tongue - Matcha cake roll step 11
  12. Whip until there are curved sharp corners when you lift the whisk, which means it has reached wet foam. Just beat until it is wet

    The green flavor on the tip of the tongue - Matcha cake roll step 12
  13. Put 1/3 of the egg white into the matcha batter

    The green flavor on the tip of the tongue - Matcha cake roll step 13
  14. Gently stir up and down evenly

    The green flavor on the tip of the tongue - Matcha cake roll step 14
  15. Add the other 2/3 of the protein paste in portions

    The green flavor on the tip of the tongue - Matcha cake roll step 15
  16. Gently stir up and down evenly

    The green flavor on the tip of the tongue - Matcha cake roll step 16
  17. After mixing, pour into a baking tray lined with baking paper

    The green flavor on the tip of the tongue - Matcha cake roll step 17
  18. Smooth the surface with a scraper

    The green flavor on the tip of the tongue - Matcha cake roll step 18
  19. Shake it a few times to remove the big bubbles

    The green flavor on the tip of the tongue - Matcha cake roll step 19
  20. Bake in the preheated oven at 170 degrees for about 15 minutes

    The green flavor on the tip of the tongue - Matcha cake roll step 20
  21. Wear gloves to take out after baking

    The green flavor on the tip of the tongue - Matcha cake roll step 21
  22. Tear off the parchment paper upside down and place a piece of parchment paper under the cake for easy rolling

    The green flavor on the tip of the tongue - Matcha cake roll step 22
  23. Pour the whipped cream into another mixing bowl

    The green flavor on the tip of the tongue - Matcha cake roll step 23
  24. Pour in granulated sugar

    The green flavor on the tip of the tongue - Matcha cake roll step 24
  25. Use an electric beater to beat until it is not flowing (can be decorated with flowers)

    The green flavor on the tip of the tongue - Matcha cake roll step 25
  26. Use a spatula to spread the fresh cream evenly on the cake base

    The green flavor on the tip of the tongue - Matcha cake roll step 26
  27. Roll up from bottom to top

    The green flavor on the tip of the tongue - Matcha cake roll step 27
  28. Wrap with a layer of oil paper

    The green flavor on the tip of the tongue - Matcha cake roll step 28
  29. Just put it in the refrigerator to set and then cut into pieces

    The green flavor on the tip of the tongue - Matcha cake roll step 29
  30. How about it? Isn’t it very simple?

    The green flavor on the tip of the tongue - Matcha cake roll step 30