Chili Squid with Sauce
Overview
In my favorite recipes, beef, pork liver, and squid are the ingredients that are difficult to control. It's either overcooked or undercooked. Three months ago, I went to a friend's house for dinner. When I saw a beautiful girl, I fried up a portion of fried squid with great color. When the meal started, I tasted the squid for the first time. Tender, fresh and elastic. According to my understanding of Da Mei Niu, Mei Niu cannot cook home-cooked dishes like this. When I asked her later, she said that she wanted to use a Mibo cooking machine to fry this dish. After dinner, the sisters cleared the table together, and then went to look at this artifact. It was quite big and beautiful in shape, and then clicked through the accompanying recipes. There were so many varieties. After this meal, I was thinking about this beautiful appliance. After talking with my father that day, I also bought this cooking machine. From this week on, I can also free up my hands to do other things. When you want to eat something or don’t know what you want to eat, you can look through the recipes that come with the machine, and then prepare the ingredients to easily copy it. Today’s stir-fried squid with seasonal vegetables is served today. I added or subtracted some more according to my family’s taste.
Tags
Ingredients
Steps
-
Prepare the ingredients, as shown in the picture, squid, celery, onions, peppers, ginger, and seasonings.

-
According to the Mibo cooking machine recipe instructions, blanch the squid in boiling water for ten seconds before frying.

-
It takes ten seconds, the temperature is one hundred degrees, and the reverse gear is the first gear. The notes are thorough and clear.

-
Then follow the prompts inside to unload the ingredients. Here is the seasoning and cooking oil. Use the ingredients brought by the machine. There is no need to adjust the temperature, time and gear. Just follow the prompts to unload the ingredients.

-
If there are any condiments in the recipe that you don’t like very much, you can change them according to your personal preferences. I changed the sauce here, which my family likes better.

-
Then put the seasonal vegetables, peppers, onions, ginger, and celery into the pot together and stir-fry until fragrant.

-
To put in such relatively large ingredients, we need to open the lid and add more ingredients.

-
I looked at the cooking time and the machine turned over for three minutes.

-
It is in this state after frying, and the color looks very good.

-
Then follow the prompts to cut the materials. Friends will know it clearly by looking at the picture.

-
These are blanched squid. After blanching and then frying, their texture is easier to grasp.

-
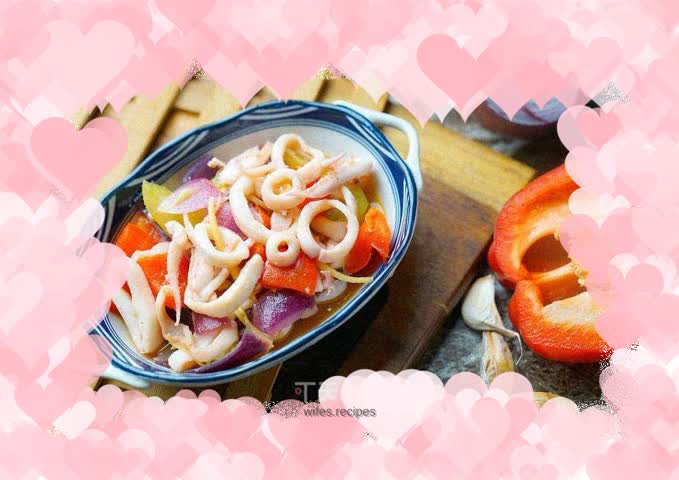
Friends can also copy it if they like. It is really nice to have this machine. It saves time and reduces fumes. It also allows us to have an idea of how much oil and salt is used in a dish.

-
The color is good like this, and the freshness is well controlled. However, friends should pay attention to one thing. The blanching time should also be adjusted according to the thickness of the ingredients we cut. This way is more reasonable.
