Cheese is power--cream cake
Overview
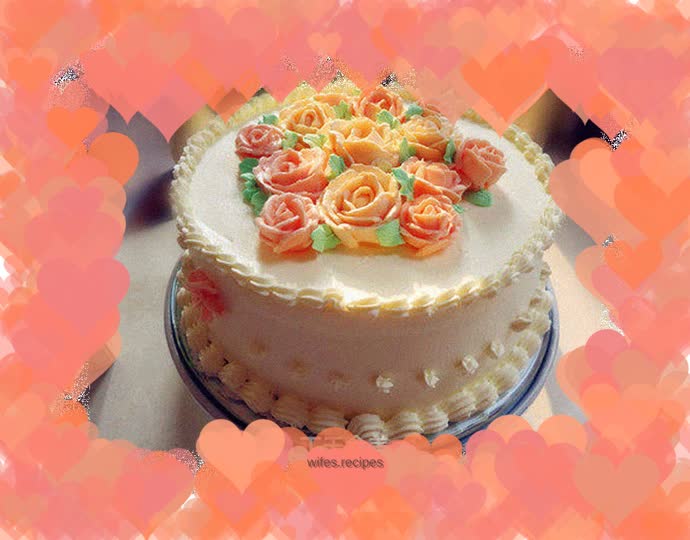
Speaking of decorated cakes, everyone who has made them knows this well. The heat resistance of animal whipped cream is very poor. If you make a cream cake in the summer, you must make it in an air-conditioned room with the temperature below 25 degrees. You must wear gloves and move quickly. From time to time, you need to put it in the refrigerator for a while. But it would be much better if you use buttercream to decorate the flowers. The buttercream can be reused during the decoration process, and it will not become rough and cannot be used. If it's soft, you can put it in the refrigerator for a while. If it's soft, you can put it in warm water to rewarm. The softness and hardness can be controlled. I still like the cream frosting with cheese. The sourness of the cheese itself just relieves the greasiness of butter, so the cheese cream frosting tastes sour and sweet, not greasy at all, and very delicious. It is my first time to decorate roses. I am a craftsman. No matter how I fiddle with them, they don’t look right. It took a lot of effort to make a few decent ones. I hope the decorating experts can give me valuable advice!
Tags
Ingredients
Steps
-
Separate yolks and whites from refrigerated eggs. Packed separately in water-free and oil-free containers.

-
First make the egg yolk batter, pour salad oil and milk into a basin

-
Add 20 grams of fine sugar and beat with a hand mixer until completely dissolved and emulsified.

-
Add egg yolks one at a time and beat evenly

-
Until all the eggs are added and beaten

-
Sift in the low-gluten flour in 2 batches, stir in a zigzag shape, stir evenly and then sift in the second flour.

-
The mixed batter is smooth and flowing. The egg yolk batter is ready.

-
Start beating the egg whites, first add a few drops of lemon juice into the egg whites.

-
Use the electric mixer at speed 1 (low speed) to beat until coarse bubbles form.

-
The amount of sugar added to the egg whites is 50 grams. At this time add 1/3 of the caster sugar. Continue beating and add the remaining sugar in 2 additions until it is evenly distributed.

-
Add 1/3 of the meringue to the egg yolk batter, cut and mix with a rubber spatula, and stir evenly from bottom to top.

-
Pour the well-mixed egg yolk batter back into the remaining meringue

-
Continue to mix with a rubber spatula.

-
Pour the mixed cake batter into the cake mold, hold the cake mold with both hands, and gently knock it from top to bottom several times to shake off the big air bubbles. Place the cake mold into the preheated oven, bake the middle and lower racks at 160 degrees for 50 minutes

-
After baking, take it out and flip it upside down

-
Let cool before unmoulding.

-
Divide the finished chiffon cake into 3 slices

-
400g whipping cream plus 40g caster sugar

-
Beat with ice water until you can hold on

-
Take a piece and place it on the mounting table, spread a layer of strawberry jam

-
Put some butter and smooth the entire surface

-
Place the second piece of cake and spread a layer of strawberry jam

-
Put some butter and smooth the entire surface

-
Place the third piece of cake on top, making sure it is aligned with the bottom two layers

-
Put the cream directly

-
Cover the entire cake with cream and spread evenly

-
Put the small chrysanthemum nozzle into a piping bag, then put the remaining cream into the piping bag and squeeze out the air, then pipe the shell flowers up and down.

-
Make cheese cream: cut butter into small pieces and soften

-
Add powdered sugar all at once

-
Whisk until the color turns white

-
Add softened cream cheese

-
Continue to beat until even

-
Squeeze in a few drops of fresh lemon juice and beat the cream a few times and it's ready.

-
Put the rose nozzle into a piping bag, then put the whipped cheese cream frosting into

-
Mount a few roses and place them in the center of the cake, then use green butter to make leaf shapes

-
The cake is finished. The roses I made are not beautiful, not realistic, not exquisite! This is my debut work. It is my first time to decorate a rose. How could I know that it will not obey my command no matter what I do? It took me several hours to make a few flowers that looked like this.
